2v1 Soccer Drills: Teaching the Attacking Overload
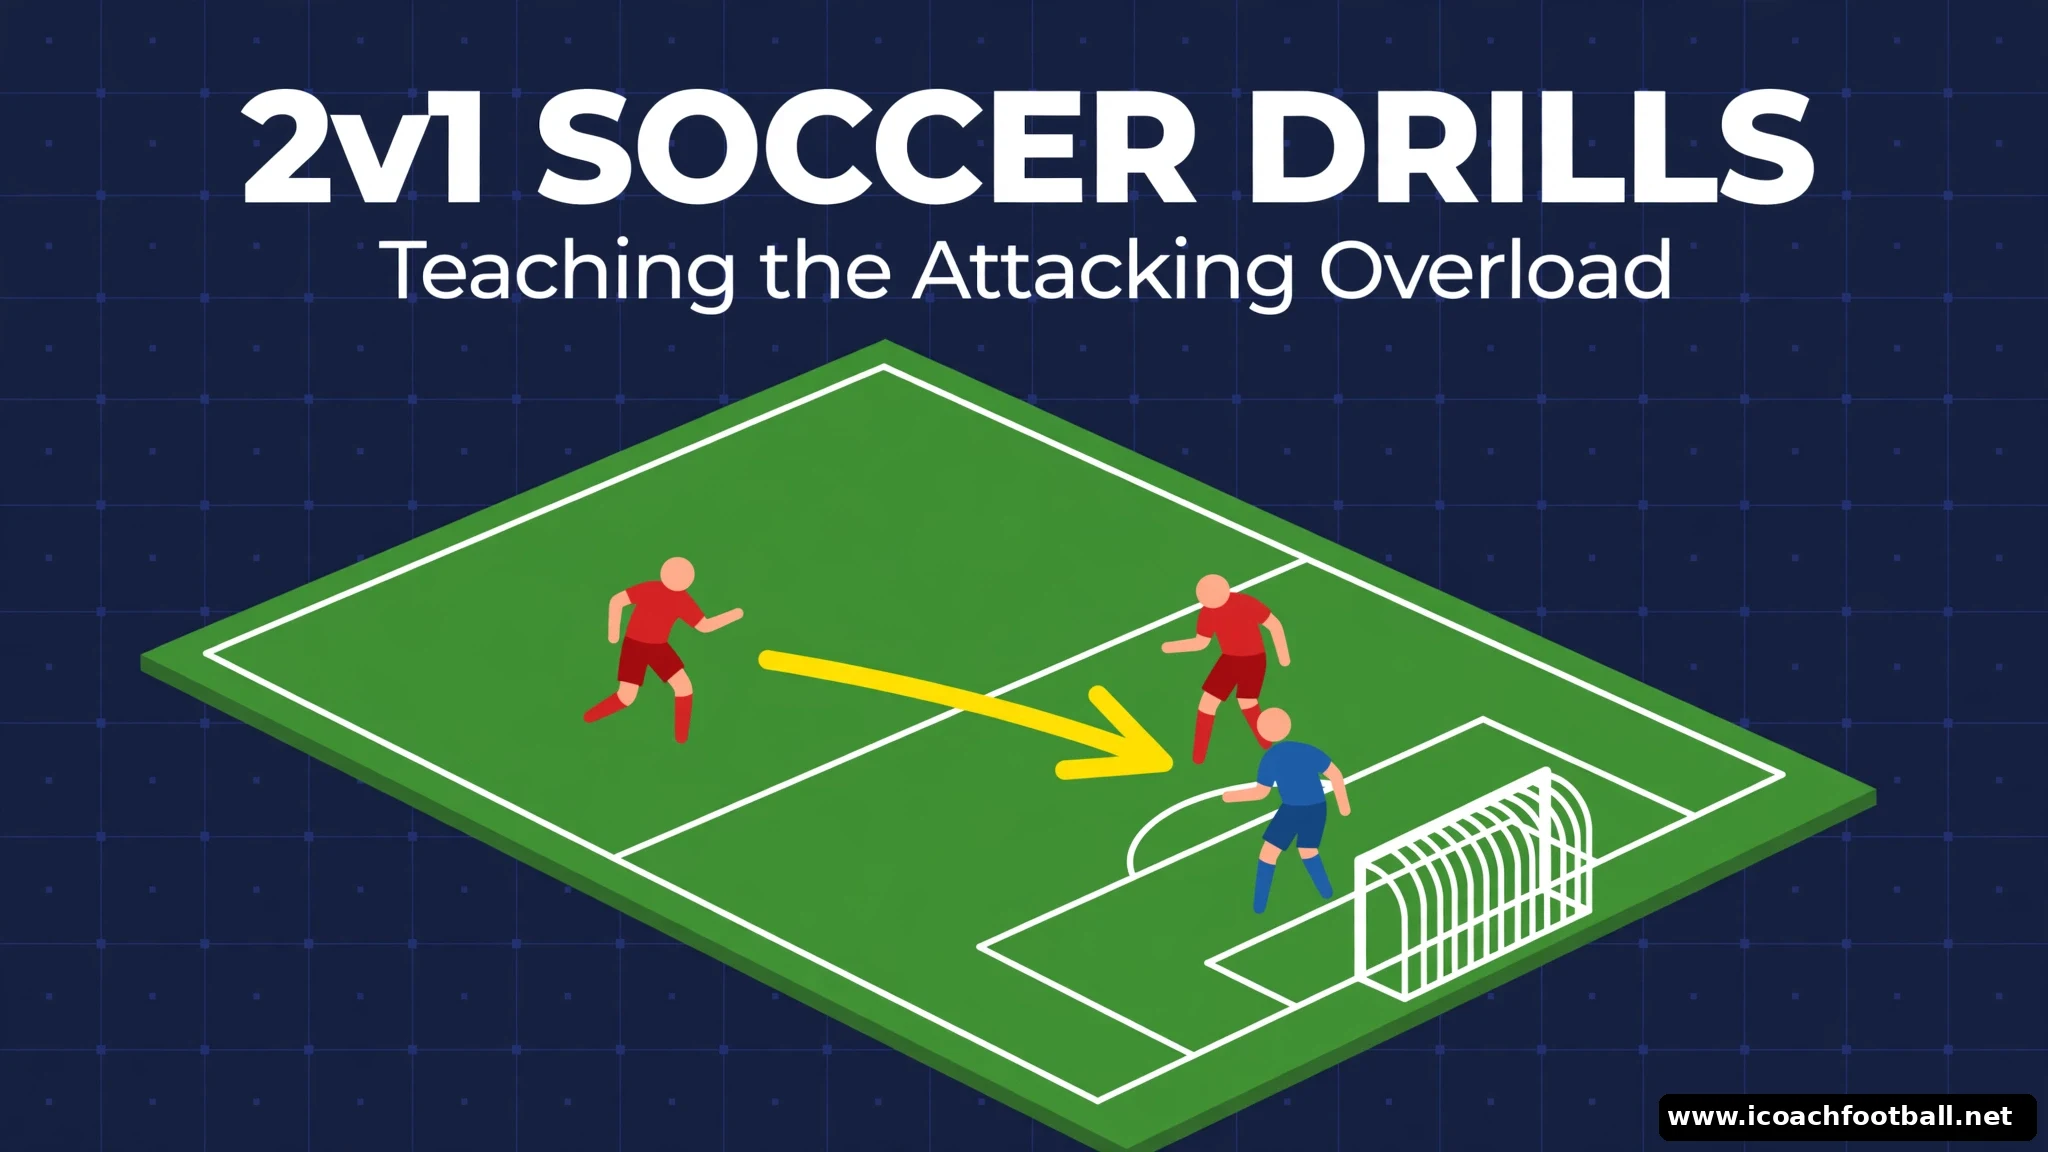
A 2v1 should be the easiest chance in soccer. Two attackers against one defender, all that space, and still the attack dies: the ball carrier dribbles straight into the defender, the support player stands behind the ball watching, and the defender wins it without moving more than two steps. The problem is not technique. It is decision-making. Young players have never been taught what a 2v1 actually is — a defender who must choose, and two attackers who must punish whichever choice he makes.
This post teaches the attacking overload the way it clicks: one clear job for the ball carrier, one clear job for the support player, then four drills that force the right decision again and again, from a first controlled 2v1 to a live game where overloads appear and disappear. Coaches looking for 2v1 football drills will find the same progression here — only the name of the game changes.
Once players can commit one defender and find the spare player in a 2v1, progress to 3v2 soccer drills, where a second spare player adds a second decision.
- Players: 8–16 (drills scale from 3-player groups to full-team games; adjustments below).
- Area: 30 x 20 yards for the core drills, up to half a pitch for the final game.
- Duration: 60 minutes (45-minute version included).
- Focus: committing the defender, support angle and distance, pass-or-dribble decision, fast finish.
- Equipment: 10+ balls, 2 sets of bibs, 20 cones, 2 goals or 4 mini-goals, 1 whistle.
- Age: U9–U15 (start with the unopposed pattern at U9–U10; add a live defender and a recovering second defender from U12).
The one idea that makes a 2v1 work
A defender facing two attackers has an impossible job — but only if the attackers make him choose. If the ball carrier stays wide and passes early, the defender can cover both. If the support player stands level with the ball, the defender can see both. The overload works when the ball carrier drives AT the defender and the support player stays wide, slightly behind the ball, at an angle the defender cannot cover without turning his back.
Teach it as two jobs, and say them every time:
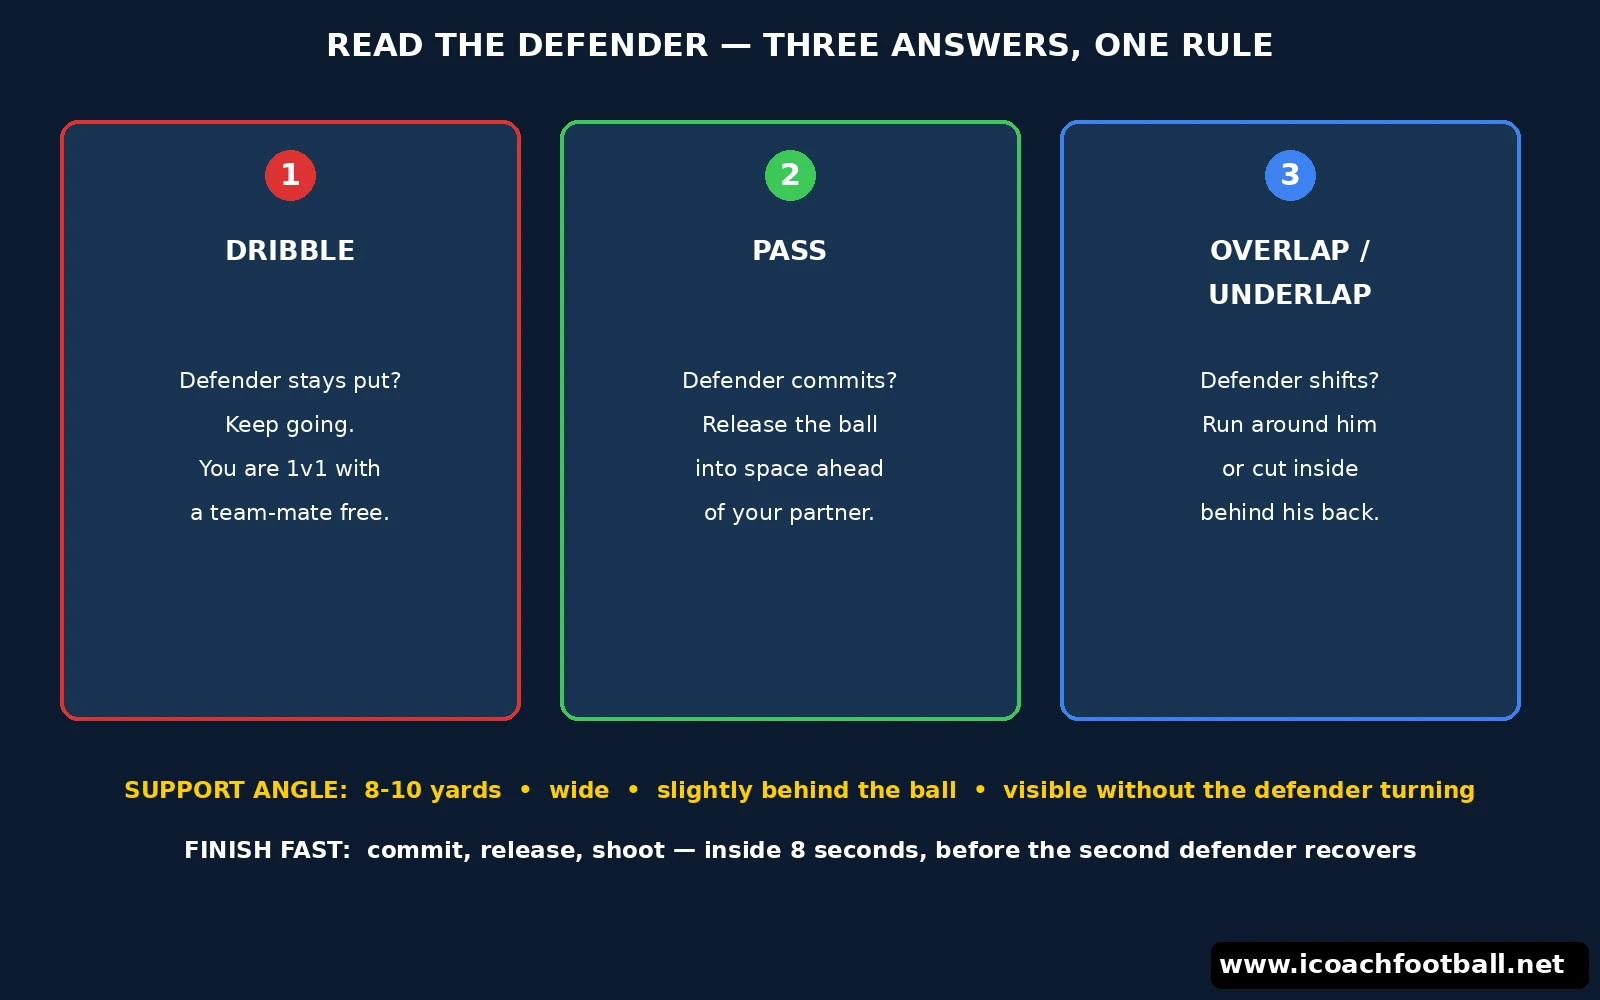
- Ball carrier: commit the defender. Dribble straight at him, at speed, with small touches. Do not pass until he steps towards you or shifts his weight. The cue is ‘Make him choose!’ If he stays put, keep dribbling — you are now in a 1v1 with a team-mate free behind you. If he comes to you, release the ball.
- Support player: be the answer, not an audience. Stay wide, stay visible, and stay at an angle — roughly 8 to 10 yards from the ball carrier, a yard or two behind the ball, so the defender would have to turn completely to cover you. The cue is ‘Wide and ready!’ Then sprint forward the moment the ball is released, so you receive it moving towards goal, not standing still.
That is the whole principle, and it is in line with the FIFA Training Centre’s overload work, which stresses creating 2v1 situations as quickly as possible, driving forward with the ball to put the defence on the back foot, and using firm, precise passes to cut through. The link to that session is at the end of this post. Everything in the four drills below is just that principle, repeated at increasing speed and pressure.
Drill 1 — Commit and Release (the first 2v1)
Setup: a 30 x 20 yard channel with one goal at the far end and a goalkeeper if you have one (a cone goal works). Two attackers start at the near end, one defender starts 15 yards from goal, level with the penalty spot. One ball per repetition, spares behind the attackers.
How it works:
- Attacker A dribbles straight at the defender. Attacker B starts wide, 8 yards to A’s right, slightly behind the ball.
- A must not pass until the defender steps forward or shifts his weight to one side. B stays wide and calls ‘Wide!’ so A knows the option is there without looking.
- When the defender commits, A plays a firm pass into B’s path — in front of B, not at B’s feet — and sprints forward for a return or a rebound.
- B takes one touch towards goal and finishes first time if possible. If the defender holds his position and does not commit, A keeps dribbling and shoots — the drill only ends with a shot or a defender’s clearance.
- Rotate every repetition: A becomes the defender, the defender becomes B, B becomes A. Swap sides after 5 minutes so the support run comes from the left as well.
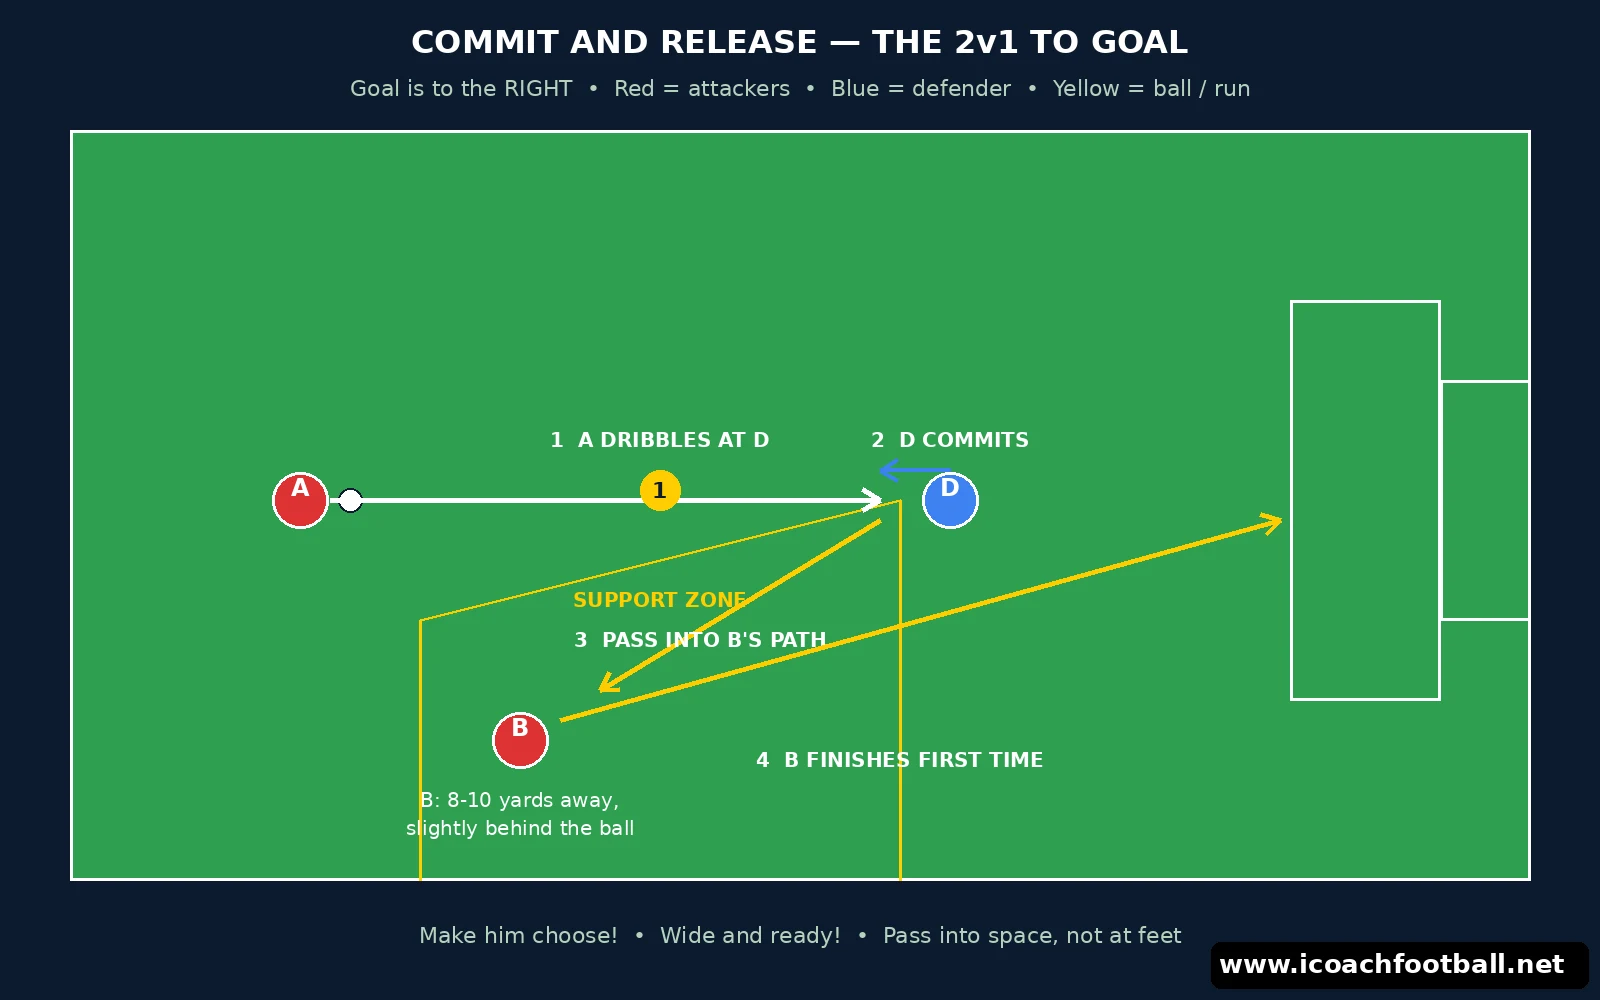
Coaching points: the pass must be played into space ahead of the support player, so B arrives at full speed. A pass played at B’s feet kills the overload — B has to stop, turn, and the defender recovers. If A passes too early, before the defender has moved, stop the rep and restart it: ‘Make him choose first!’ That one correction, repeated ten times, teaches more than any talk.
Common mistake: B creeps infield to get closer to the ball. Fix it with a cone line — B must stay outside a wide cone until the pass is played. Width is what makes the defender choose; without it, there is no overload, just two players in front of one defender.
Drill 2 — The Overlap and the Underlap (two ways to beat the same defender)
Setup: the same 30 x 20 yard channel, one goal. Two attackers, one defender, plus a second cone 10 yards wide of the channel marking the overlap lane. One ball per repetition.
How it works:
- A dribbles at the defender with B wide, as in Drill 1. This time B has two choices, and must pick one and commit to it.
- Overlap: B sprints around the outside of A, past the wide cone, and A slips the ball into B’s run. B finishes from the wide angle or cuts it back to A, who has continued forward.
- Underlap: B cuts inside, behind the defender’s blind side, and A plays a short pass into the space the defender has vacated by stepping towards A. B finishes from central.
- Alternate the choice every two repetitions — call ‘Over!’ or ‘Under!’ before the run so the pair practises both, then let them choose freely for the last 3 minutes and see if they pick the option the defender’s body shape invites.
- Rotate roles every 3 minutes, and swap the wide side so both feet and both angles get practised.
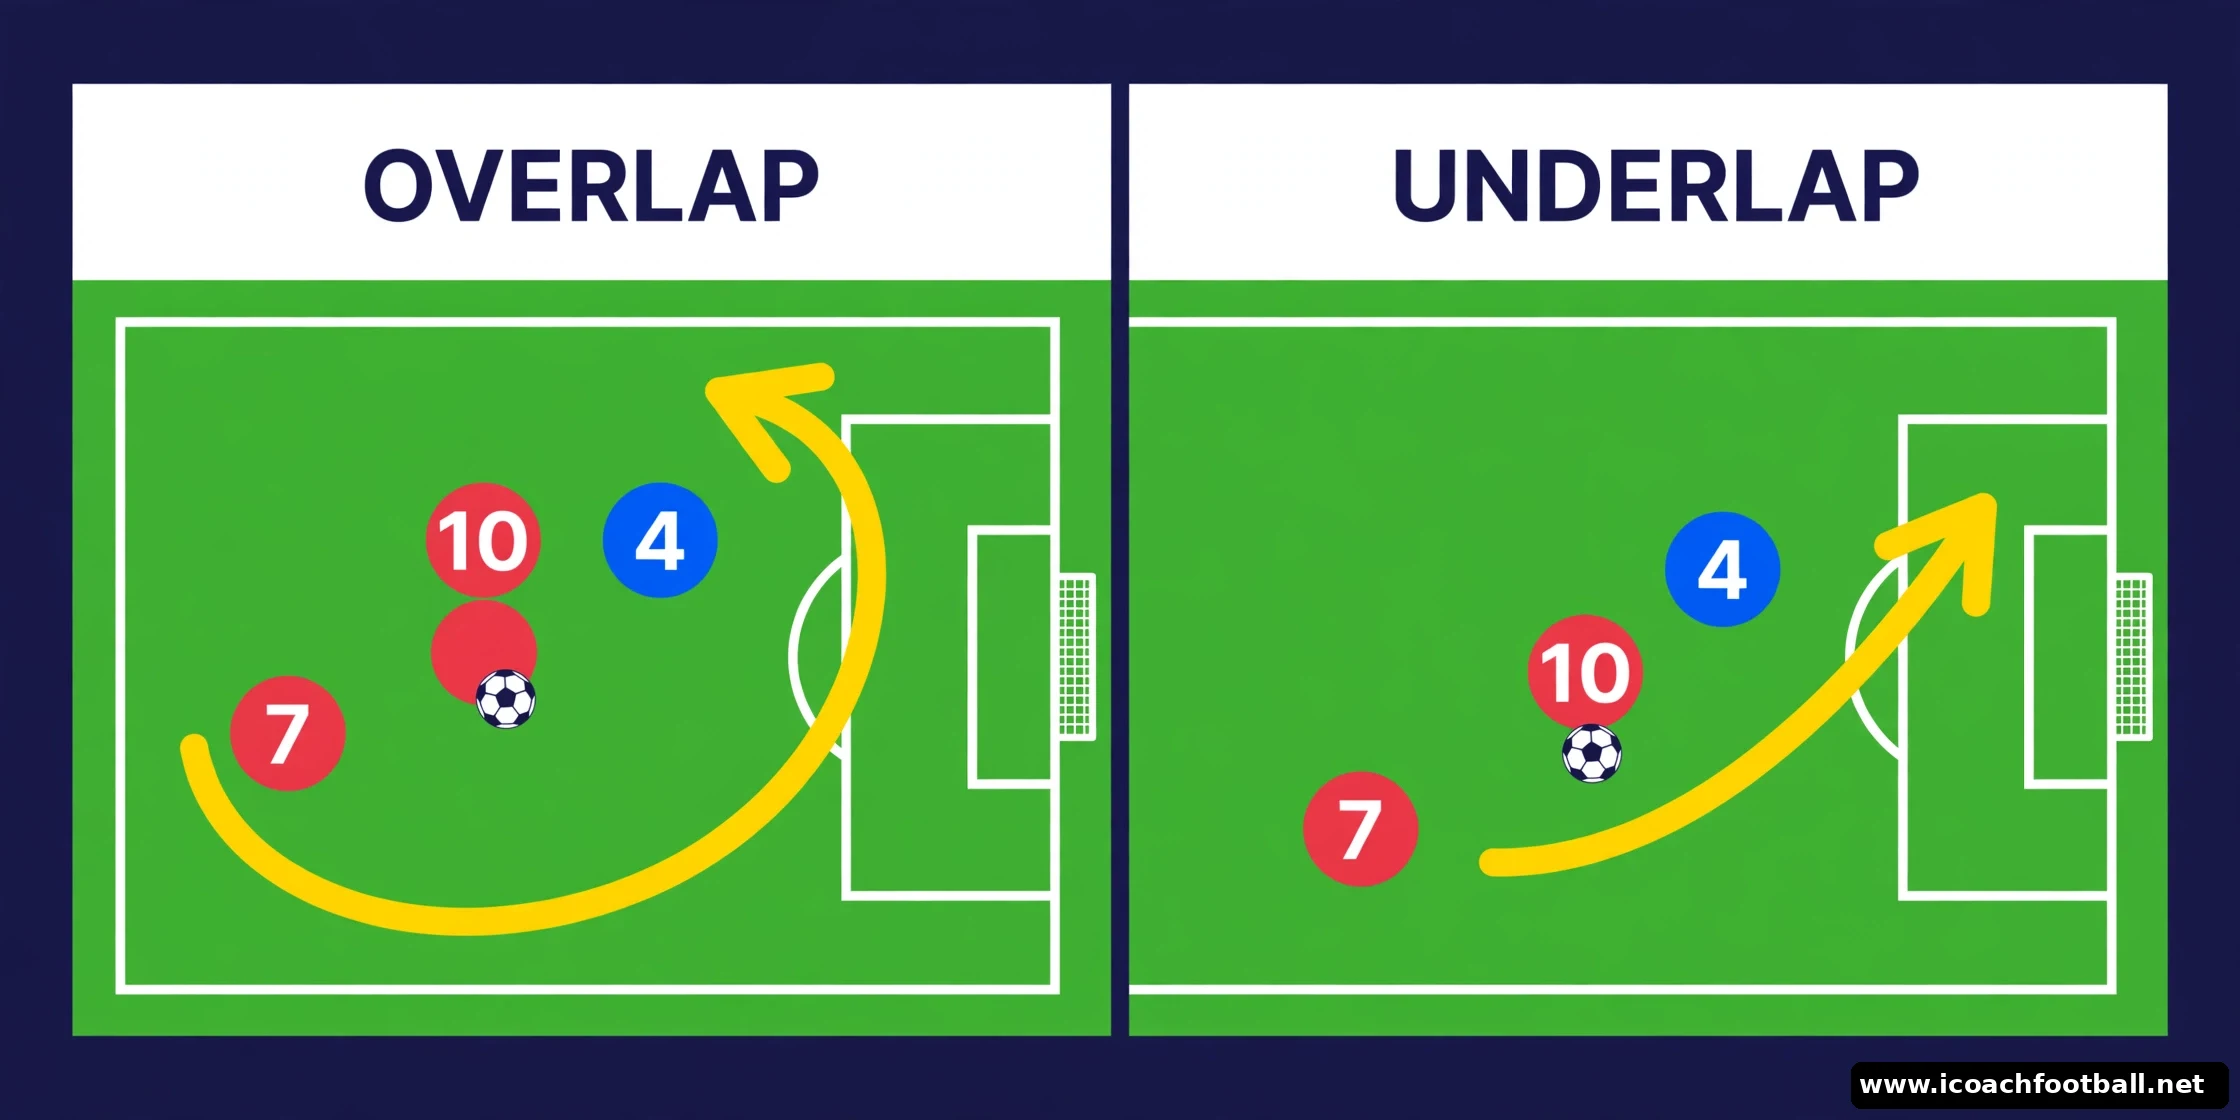
Coaching points: the run must start BEFORE the pass, not after it. A support player who waits to see the pass will always arrive late. The cue is ‘Run first, ball follows!’ Also coach the defender: a defender who delays, stays goal-side and forces the attackers wide is doing his job well, and the attackers must learn that a 2v1 against a good delaying defender still ends in a shot — just a wider, harder one. That is a lesson worth learning in training, not in a match. For the defending detail, see the 1v1 defending post linked below.
Drill 3 — 2v1 Waves (speed, recovery and the second ball)
Setup: two channels side by side, each 25 x 20 yards, one goal each, goalkeepers if available. Groups of three at each end: two attackers and one defender per channel. Balls with the coach at the side.
How it works:
- The coach serves a ball to the first pair. They attack 2v1 and must finish within 8 seconds — count it out loud. Speed is the point: an overload that takes 20 seconds is no overload, because the second defender has recovered.
- As soon as the ball is dead — goal, save, or clearance — the next pair starts immediately from the coach’s next serve. No walking back, no waiting for a whistle.
- After 4 minutes, the defender in each channel swaps with an attacker, and the channels swap ends. Run 3 blocks of 4 minutes with a 1-minute break between blocks.
- Progression: after the first block, add a recovering defender who starts 10 yards behind the attackers and sprints back once the coach serves the ball. Now the attackers have roughly 6 seconds before it becomes a 2v2 — exactly the urgency a real match creates.
Coaching points: count the seconds, every rep. Players do not feel urgency until they hear it. The cue is ‘Six seconds — go!’ If a pair takes more than two touches each before shooting, stop them: the overload is a two-touch idea — commit, release, finish. The finishing detail matters here too: a first-time finish, or one touch and a shot, beats a perfect finish taken three seconds too late. The 1v1 finishing drills linked below are the right follow-up for players who keep taking an extra touch.
Drill 4 — The Overload Game (4v4 with a floating 2v1)
Setup: a 40 x 30 yard pitch, two goals, two teams of 4. One neutral player in a different bib who always plays for the team in possession. One ball in play, spares at each end.
How it works:
- Play normal 4v4, but the neutral joins the attacking team, so every attack is 5v4 — and, crucially, overloads of 2v1 appear constantly in wide areas and around the ball.
- A goal counts double if it follows a pass that created a clear 2v1 — the scorer’s team calls it, and you confirm it. This makes players hunt for the overload instead of just playing through the middle.
- If the defending team wins the ball, the neutral switches to them instantly, and the team that lost it must recover into shape in 3 seconds. That transition is where most youth goals are lost, and it is coached in the 1v1-to-4v4 transition drill linked below.
- Play 4 x 4-minute games, rotating the neutral every game so every player experiences being the spare player — the player who must read where the 2v1 is and arrive there.
Coaching points: freeze the game twice, no more. The first freeze: a moment when a 2v1 was available wide and nobody used it — walk the support player to the right spot and restart. The second: a moment when a player dribbled into a 2v1 instead of passing — ask the group what the defender was forced to choose. Two freezes teach the game; ten freezes kill it.
Common mistakes (and the fix)
- Mistake: the ball carrier passes the moment he sees the defender. Fix: no pass until the defender moves. Use Drill 1’s restart rule — pass too early, rep restarts.
- Mistake: the support player stands level with the ball, or behind the defender’s eyeline. Fix: the wide cone in Drill 1, and the cue ‘Wide and ready!’ — if the defender can see both attackers without turning his head, the support angle is wrong.
- Mistake: the pass is played at the support player’s feet. Fix: pass into the space in front of him, at pace. Demonstrate it once with a ball at walking speed — players copy what they see, not what they hear.
- Mistake: both attackers shoot from distance instead of using the overload. Fix: Drill 3’s 8-second rule with a condition — the finish must come after a pass that beat the defender, or the goal does not count. It sounds harsh; it works in one session.
- Mistake: players only practise 2v1s from the right. Fix: swap sides every 5 minutes in every drill, and make the left-footed players lead the overlap in Drill 2. A 2v1 that only works one way is half a skill.
Adapting by age group
- U9–U10: run Drills 1 and 2 only, with a passive defender who may not tackle for the first 10 minutes, and no time limit. The idea — commit, then release — matters more than the finish. Keep groups to three and rotate constantly so nobody stands in a queue.
- U11–U12: run all four drills as written, with the 8-second rule in Drill 3. Introduce the recovering defender in the second block, and let players choose overlap or underlap freely in Drill 2.
- U13–U15: add the recovering defender from the start of Drill 3, shrink the channels to 20 x 18 yards so decisions come faster, and in Drill 4 let the defending team press the neutral — now the spare player must receive under pressure, which is the real match skill. Link the overload to your wider attacking shape: a 2v1 wide is how most goals against a compact defence actually start.
The 45-minute version
Warm-up (5 min): pairs passing on the move, one player always offering a wide angle. Drill 1 (10 min). Drill 2 (10 min). Drill 3 (10 min, two blocks). Drill 4 game (10 min). Skip the recovering-defender progression on a short session and use it as the next session’s opening drill — it deserves its own 10 minutes, not a rushed 3.
Frequently Asked Questions
What is a 2v1 in soccer?
A 2v1 is an attacking overload: two attackers against one defender. It works only if the ball carrier dribbles at the defender and forces him to choose, while the support player stays wide at an angle the defender cannot cover. If neither attacker makes the defender choose, a 2v1 is just two players standing in front of one defender.
Should the ball carrier pass or dribble in a 2v1?
Dribble first, pass second. Drive at the defender until he steps towards you or shifts his weight, then release the ball into the support player’s path. Passing before the defender commits lets him cover both attackers. If he never commits, keep dribbling and take the shot yourself — that is still the right decision.
Where should the second attacker stand in a 2v1?
Wide, slightly behind the ball, about 8 to 10 yards from the ball carrier, at an angle the defender cannot see without turning his head. If the support player stands level with the ball or creeps infield, the defender can cover both attackers at once and the overload disappears.
How do you teach 2v1 to U10 players?
Start with a passive defender who does not tackle, and teach one idea only: dribble at the defender, then pass when he moves. Use Drill 1 with a wide cone to hold the support player’s position, rotate roles every repetition, and do not add a time limit until the decision is automatic — usually after two or three sessions.
What is the difference between an overlap and an underlap in a 2v1?
An overlap is a run around the outside of the ball carrier, into the wide space; an underlap is a run inside, behind the defender’s blind side, into the space the defender vacated. Overlaps stretch the defence wide, underlaps attack the space in front of goal. Teach both, then let players pick the one the defender’s body shape invites.
Once the pair can do that with a second defender pressing as well, use these 2v2 soccer drills to teach pairs to combine and defend together.
The attack only works if the defence makes a mistake — these soccer defending 2v1 drills train the other side of the same moment: the defender who delays, denies and survives until help arrives.