Goalkeeper Shot-Stopping Drills for Youth Keepers
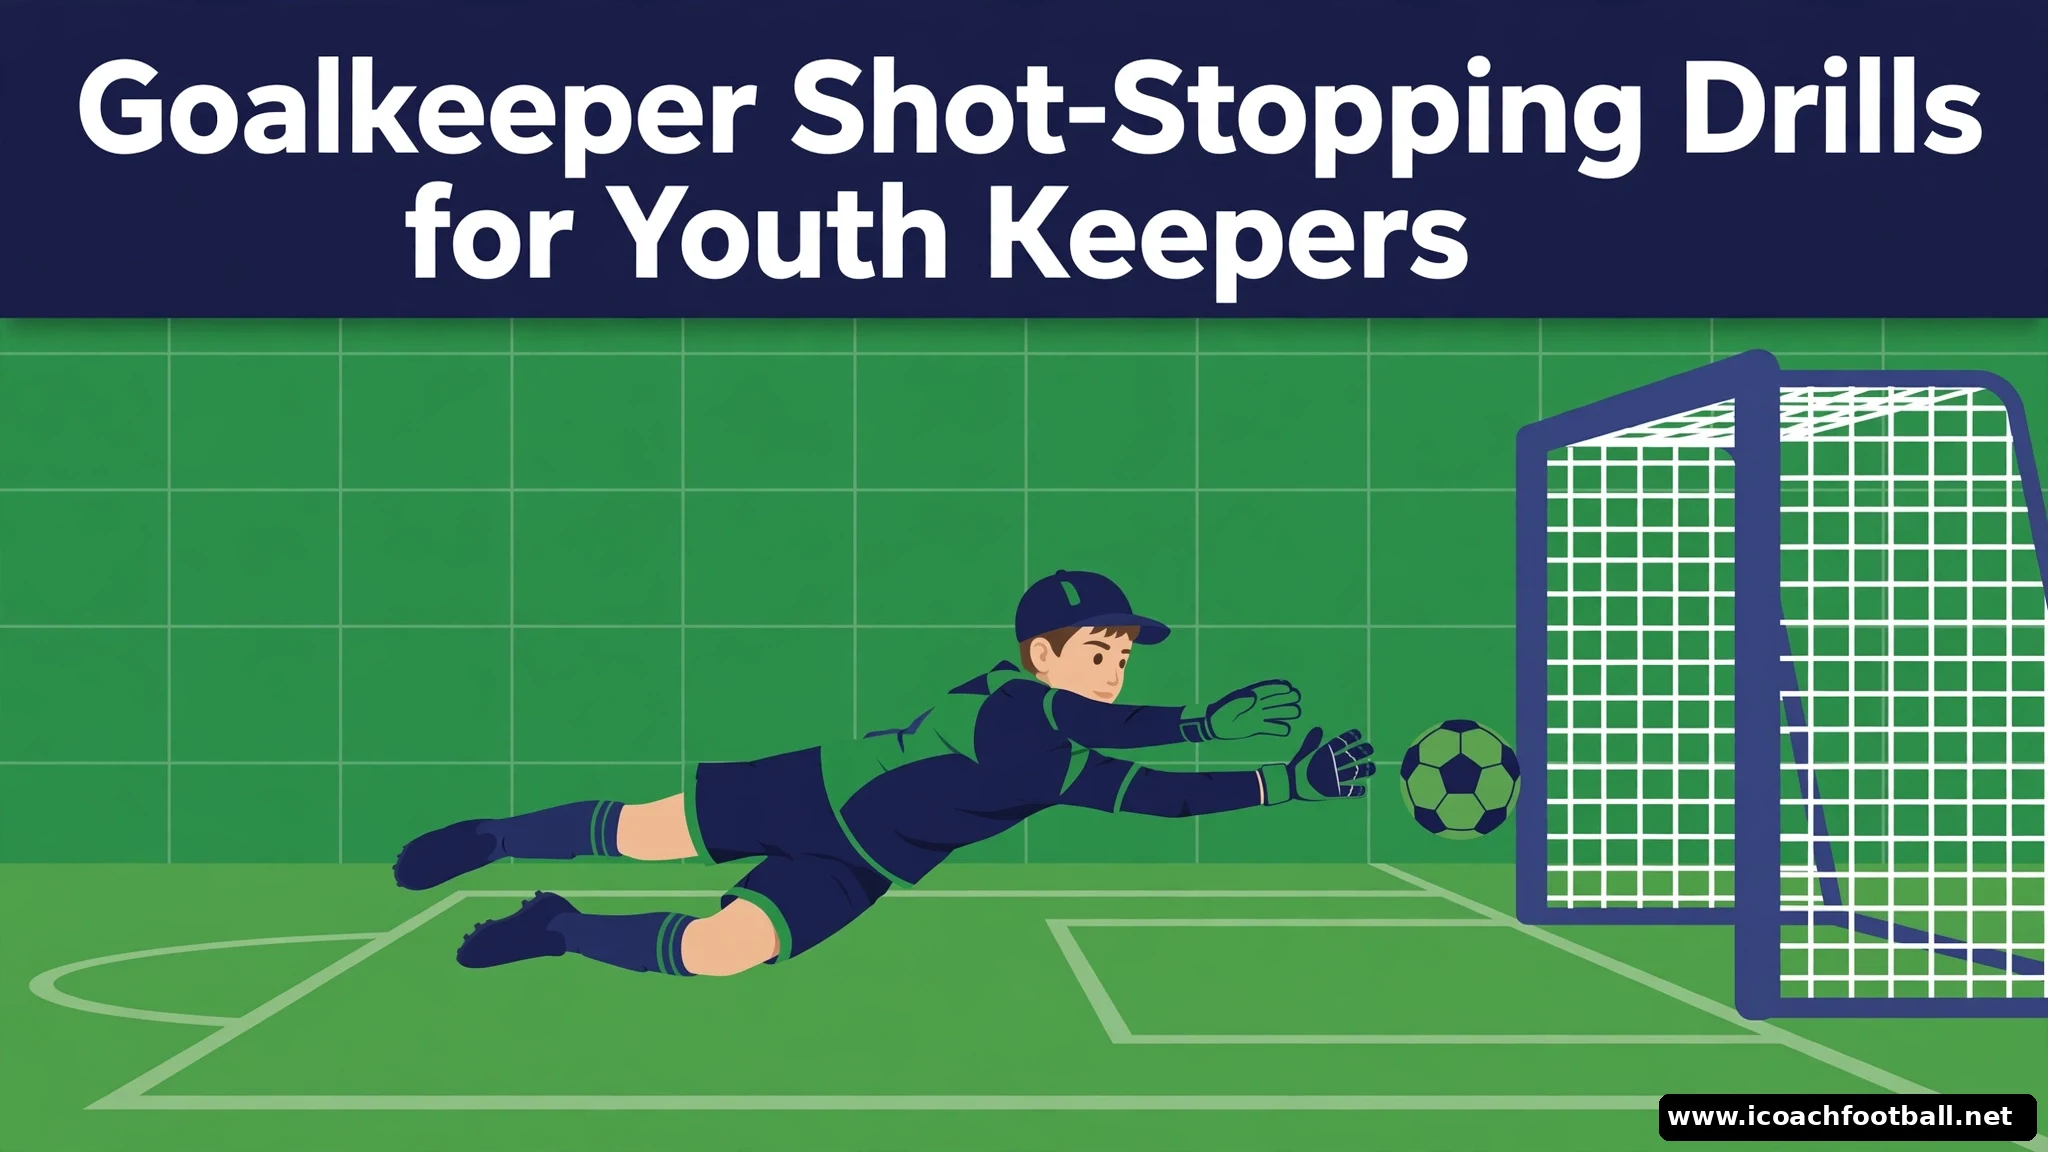
A youth goalkeeper does not become a good shot-stopper by facing more shots. They become one by facing the right shots, in the right order, with time to get set — and then by facing them again when they are tired, off balance and out of position, which is how shots arrive in a match. Most youth keepers fail for boring reasons: they are still moving when the shot is struck, their hands start behind their body, or they parry the ball straight back to the shooter. All three are coachable in one session.
These six youth goalkeeper shot stopping drills build shot-stopping in the order a keeper actually needs it: set position and handling first, low saves next, high and diving saves after that, then rebounds and cut-backs, and finally shots inside a game. The same progression works for coaches searching for youth goalkeeper shot stopping drills in soccer, whatever name the game goes by where you coach. Every drill states the exact setup so a coach can run it from the diagram and steps alone, and every drill tells you when to stop — diving is high-impact work, and a tired young keeper who keeps diving learns bad landings, not good saves.
- Players: 1–3 goalkeepers plus 3–6 servers/shooters (one keeper can work alone with a coach serving)
- Area: one goal and the penalty area; Drill 1 uses a 15 x 20 metre area with a shooting line 9 metres from the goal line
- Duration: 60 minutes (45-minute version: Drills 1, 3 and 6 only)
- Focus: set position, clean handling, low and high diving saves, parrying wide, second-ball reactions
- Equipment: 1 goal (age-appropriate size), 8–10 balls, 12 cones, bibs, 2 mini-goals for Drill 6 if available
- Age: U9–U16 (handling and set position from U9; low diving from U11; full-height diving and cut-backs from U13 — see age adaptations)
The set position is the save
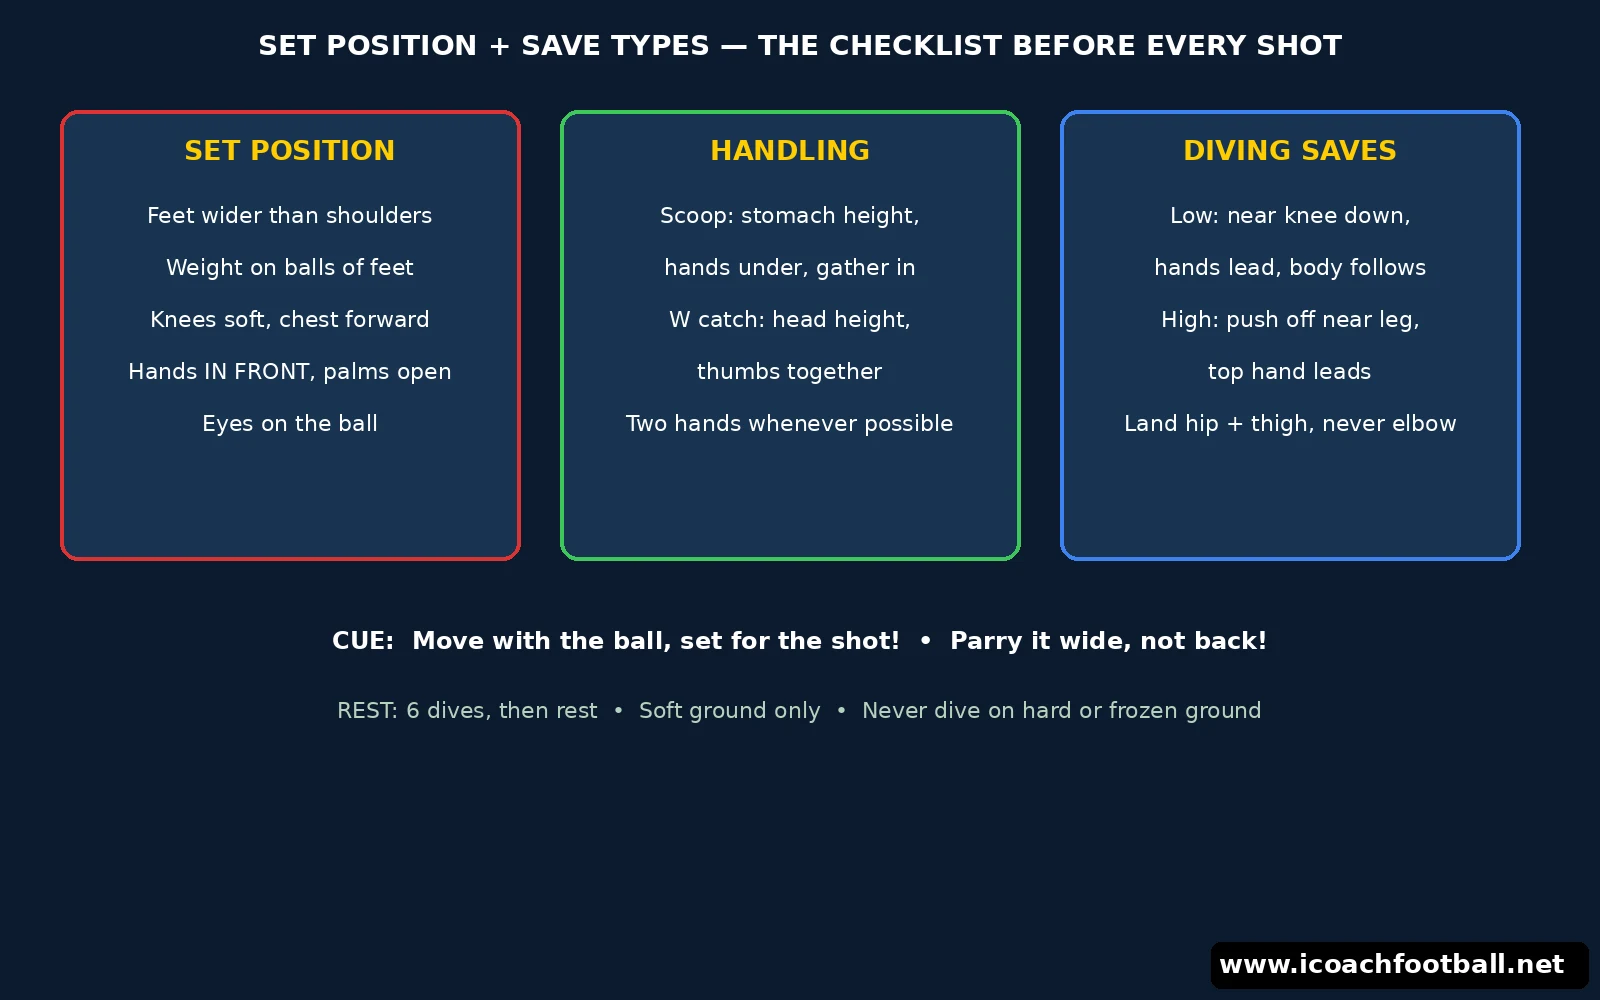
Before any drill below, teach the set position as a habit, not a pose. Feet just wider than shoulder-width, weight on the balls of the feet, knees soft, chest forward, hands in front of the body at waist height, palms open and relaxed, eyes on the ball. The keeper moves while the ball moves — small, quick adjustment steps, always facing the ball — and finishes their feet before the shot. The cue is “Move with the ball, set for the shot!” Say it until keepers say it back.
Two details decide most youth saves. First, the keeper must be still — anchored, both feet grounded — at the moment the shot is struck. A keeper still travelling cannot push off in either direction and will fall backwards as the ball goes past. Second, the hands must start in front of the body. Hands held behind the hips or down by the knees arrive a fraction late, and that fraction is the goal. In every drill below, stop the keeper who moves early or lets their hands drop, reset them, and run the rep again. One correct rep teaches more than ten rushed ones.
That emphasis is in line with the FIFA Training Centre’s shot-stopping work, which stresses the goalkeeper being stationary and anchored to the ground when the attacker shoots, and parrying shots into wide areas rather than back into danger. The link to that work is at the end of this post.
Drill 1 — Frontal Shots (the FIFA-based handling drill)
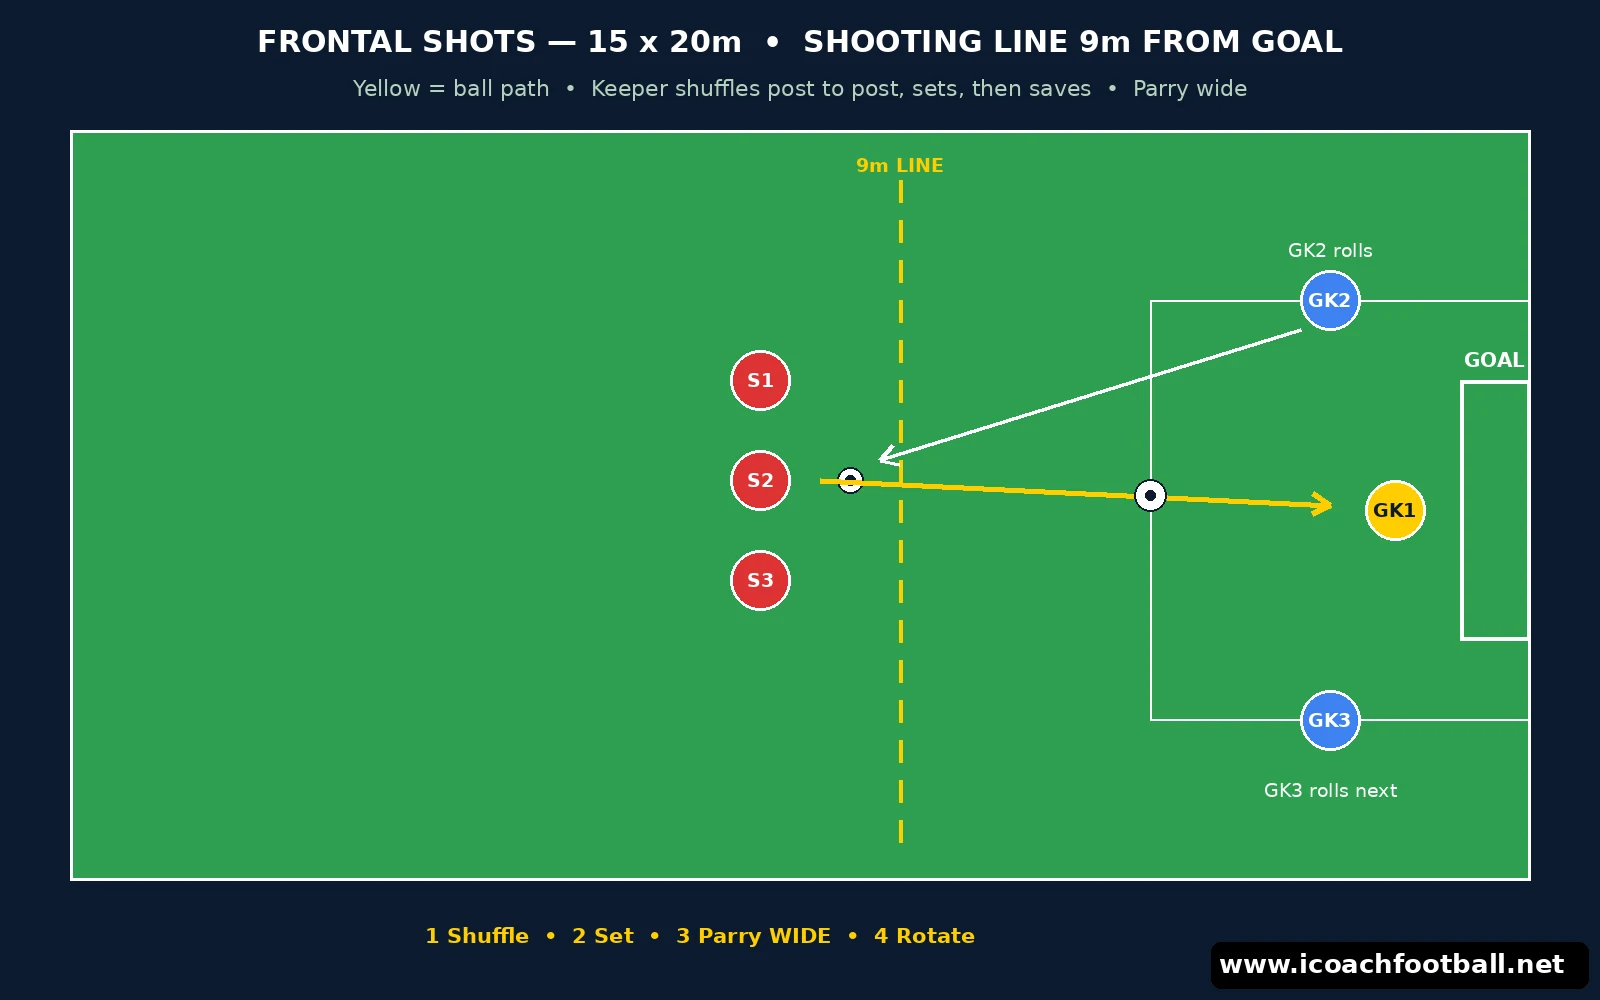
Setup: a 15 x 20 metre area with a full-size or age-appropriate goal at one end. Mark a dotted shooting line 9 metres from the goal line with cones. Three goalkeepers: one in goal, the other two beside the goal, each with a ball. Six shooters queue behind the 9-metre line.
How it works:
- The keeper in goal shuffles sideways between the posts, touching each post, then sets in the centre as the first shooter receives the ball.
- Goalkeeper 2, beside the goal, rolls the ball to the first shooter, who takes a first-time shot from behind the 9-metre line.
- The keeper saves, holds or parries wide, then the keepers rotate: goalkeeper 3 rolls to the next shooter, goalkeeper 2 goes in goal, goalkeeper 1 moves beside the goal. Each keeper faces six shots before resting.
- If the keeper parries a shot back to the shooter, the shooter has a maximum of two touches to finish again — the keeper must recover, set and deal with the second ball.
Coaching points: “Set before the shot, not during it!” Watch the feet, not the hands — if the feet are still moving at the strike, the hands will be late whatever they do. Insist that every parry goes wide, into the side areas, never back through the middle: “Parry it wide, not back!” Use the cue “Hands in front, body behind the ball” for every catch. This drill is based on the FIFA Training Centre’s “Saving frontal shots” exercise, adapted here to youth goal sizes and a 9-metre shooting line; the rotation keeps three keepers working with no standing around.
Progression: shooters may take a touch before shooting; then add a second attacker who can receive a lay-off, so the keeper must read a pass as well as a shot. Regression: move the shooting line to 12 metres and serve only along the ground until handling is clean.
Drill 2 — The Handling Ladder (scoop, W and low saves)
Setup: one keeper, one server 8 yards away, in front of a goal or a marked 6-yard goal using cones. A 4 x 4 yard square of cones between server and keeper, and 7 balls with the server.
How it works:
- The keeper starts at the back of the square, shuffles forward to the front line, sets, and takes a serve. Seven serves in a set, in this order: volley to the stomach (scoop catch), volley to the head (W catch), driven ball along the ground (low side save), chipped ball to the keeper’s left (mid-height diving save), chipped ball to the right, volley to the stomach again, driven ball along the ground to the other side.
- After each save the keeper rolls the ball back to the server, returns to the back of the square and shuffles forward again. Seven serves, then rest while the next keeper works. Two sets each.
- The server varies the height and side only within the agreed order for set 1. In set 2, the order is random — the keeper must read the serve and choose the technique.
Coaching points: the scoop catch (hands under the ball, little fingers together, ball gathered into the chest) for anything at stomach height and below; the W catch (thumbs together behind the ball, fingers spread) for anything at head height. The cue for both is “Soft hands, strong wrists!” — catch the ball, do not fight it. For low saves, the keeper collapses sideways with the near knee down and the body behind the ball, never reaching with one hand across the body. If a keeper keeps spilling the W catch, drop the serve to chest height and slow it down; height is earned by clean catches.
Drill 3 — Low Dive: Collapse, Cover, Recover
Setup: one keeper in a goal, two servers 10 yards out, one 5 yards to each side of the penalty spot, each with 3 balls. Cones mark the 6-yard box.
How it works:
- Server 1 strikes a low, firm shot to the keeper’s right, aiming inside the post. The keeper takes one adjustment step, sets, then collapses to the side: near knee drops, hands lead to the ball, body follows, ball gathered into the chest.
- The keeper recovers to the centre immediately — back on their feet, set again — as Server 2 strikes low to the left. Six shots (three each side), then rest. Two sets each.
- Second set: the servers alternate without warning, and a rebound counts — if the ball is parried, the same server follows up from 6 yards and the keeper must smother the loose ball.
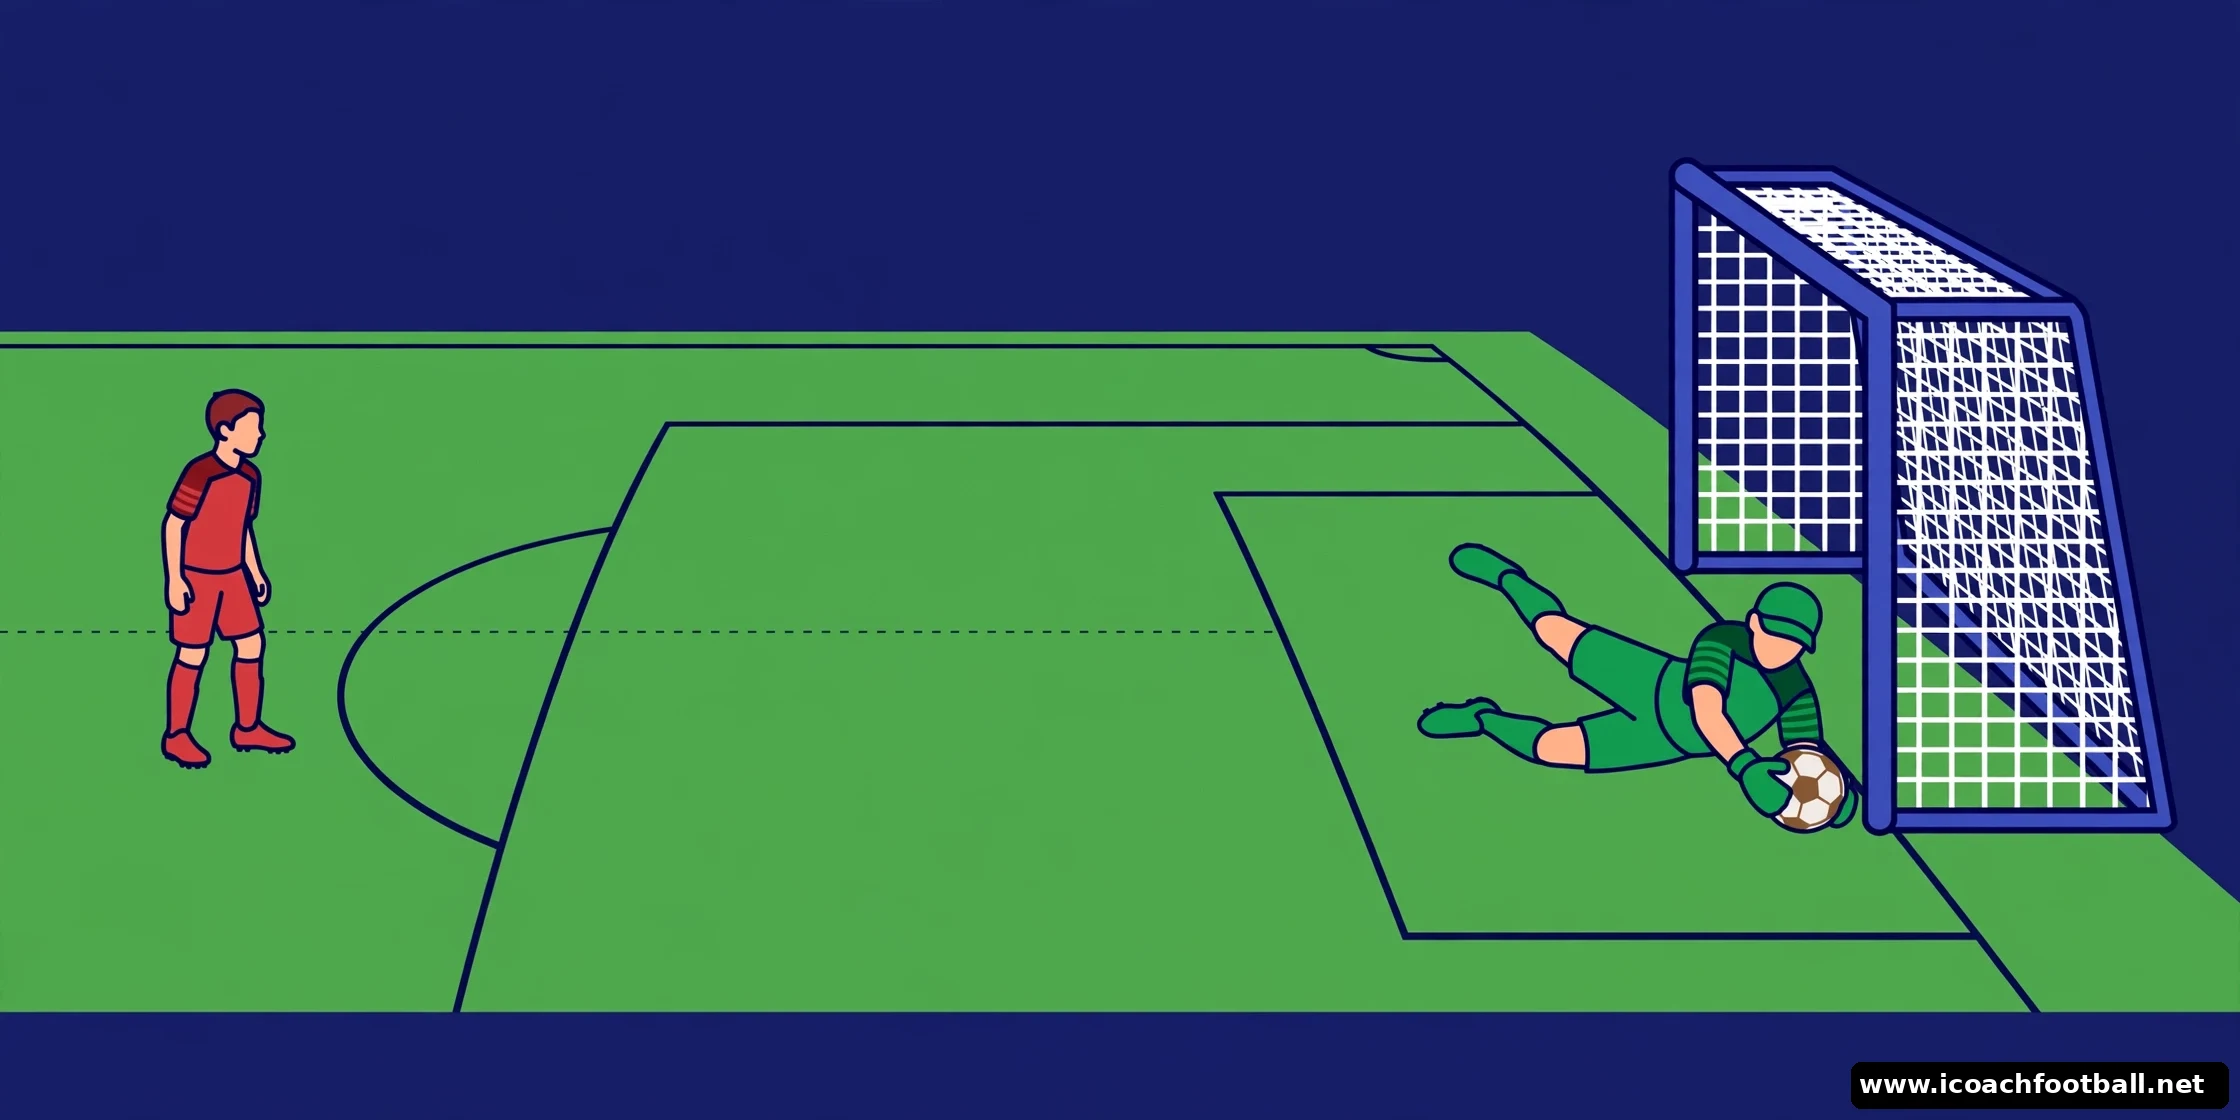
Coaching points: the dive starts from the feet, not from a leap. The push comes from the leg nearest the ball, the hands go to the ball first, and the keeper lands on the side of the hip and shoulder, never on an elbow or wrist. The cue is “Hands first, body second!” Watch for the two classic youth errors: diving too early, before the shot is struck, which leaves the far side open; and reaching with the top hand only, which turns a catch into a parry. Fix the first by delaying the serve until the keeper is set; fix the second by serving slower and demanding two hands on every low ball. Keep dive numbers low — six dives, then rest — and never run this drill on hard or frozen ground.
Drill 4 — High Dive: Top Corners Without Fear
Setup: one keeper in a goal, one server 12 yards out with 6 balls, two cones marking a “take-off zone” 2 yards in front of each post. Soft ground only, and a keeper who is not confident diving yet starts from their knees for the first set.
How it works:
- The server throws (not strikes) a high ball towards the top corner, alternating sides. The keeper takes two adjustment steps towards the ball side, sets, pushes off the near leg, extends the top hand and tips the ball over or round the post, landing on the side of the body.
- After each save the keeper returns to the centre, sets, and faces the next throw. Six throws (three each side), then rest. Two sets each.
- Progression: the server strikes the ball from 14 yards instead of throwing, but only when the keeper’s landings are clean and controlled. Regression: start on the knees, 6 yards out, with gentle throws — the keeper learns the hand shape and the landing before the height is added.
Coaching points: the top hand leads and the bottom hand follows to secure the ball; a one-handed tip is a save, not a failure, when the ball is truly out of reach — but it must go over the bar or wide, never back into the six-yard box. The cue is “Push, reach, land soft!” Land on the hip and the side of the thigh, with the ball cushioned into the body, and roll out of the landing rather than bracing with a straight arm. If a keeper is landing on their elbow or holding their wrist, stop the drill, go back to knee-height throws and rebuild the landing. Confidence in this drill comes from landings, not from saves.
Drill 5 — Cut-Backs and Second Balls
Setup: one keeper in a goal, a server wide on each side of the penalty area with 3 balls each, and one attacker on the penalty spot. Cones mark a 5-yard channel down each side of the box.
How it works:
- The wide server drives a low cut-back across the face of goal. The keeper must move along the goal line with the ball, set as the cut-back is played, and either gather it or dive low to smother it before the attacker reaches it.
- If the ball breaks loose, play is live: the attacker tries to finish the rebound and the keeper must recover and block or smother. One cut-back from each side, then the attacker and keeper swap roles in the rotation.
- Second variation: the wide server plays the ball to the attacker on the penalty spot, who takes one touch and shoots. The keeper reads the touch — if it is heavy, the keeper comes out to smother; if it is clean, the keeper holds the line and sets for the shot.
Coaching points: this is a positioning drill disguised as a shot-stopping drill. The keeper who is still travelling across the goal when the cut-back arrives is beaten before the shot. The cue is “Travel early, set early!” Read the attacker’s first touch the way the FIFA Training Centre’s 1v1 framework describes it — read, close, set, wait, then attack the ball only on a clear trigger such as a heavy touch. The most common mistake is charging every cut-back: a keeper who leaves the line on a ball they cannot reach leaves an empty goal. Teach the rule “If you cannot get there first, stay and set.”
Drill 6 — The Shot-Stopping Game (shots under match pressure)
Setup: 5v5 plus goalkeepers on a 30 x 20 yard pitch with full-size youth goals. Two mini-goals or cone goals at each end as restart targets for the keepers. One ball in play, spares behind each goal.
How it works:
- Normal 5v5, with one rule that creates the shot-stopping work: a team may only shoot from inside the attacking half, and every shot must be followed by an immediate second phase — if the keeper saves or parries, play continues and the attackers hunt the rebound.
- Keepers restart every save they hold by throwing or kicking into a mini-goal target within 5 seconds, which trains distribution under the same pressure as the save. The distribution work in our goalkeeper distribution drills post builds directly on this habit.
- Play 4 x 4-minute blocks, swapping keepers every block so no keeper faces more than 4 minutes of continuous shooting. Award keepers a point for every clean hold and two points for a parry that goes wide and stays out of danger.
Coaching points: this is where the session is tested. Watch whether the set position survives fatigue — tired keepers start standing tall with their hands down, and that is the moment to stop the block, reset and go again. Shout the cues from Drills 1–3 rather than new ones: “Set!”, “Hands in front!”, “Parry it wide!” Keep the tempo high for the outfield players but protect the keeper’s rest: a keeper who has just made three diving saves in a row needs the next 30 seconds at walking pace. The game also teaches the outfield players something useful — shooting early and following in for rebounds, which is exactly the pressure keepers face on match day.
Coaching points that fix most youth keepers
- Feet before hands. If the feet are not set, the hands will be late. Check the feet on every rep, not just the save.
- Parry wide, never back. A parry through the middle is a second shot for the attacker. Wide and out of the box is a good save.
- Two hands whenever possible. One-handed saves look spectacular and concede rebounds. Two hands hold the ball.
- Recover after every save. The save is not finished until the keeper is back on their feet, set and facing the next ball. Second balls decide matches.
- Talk through the session. A keeper who calls “Keeper’s!” and “Away!” organises the defence in front of them. Silence in goal is a coaching problem, not a personality trait.
- Protect the landings. Soft ground, low numbers of dives, full rest between sets. A keeper who is afraid of landing will not dive in a match.
Common mistakes — and the fix
- Diving before the shot. The keeper guesses a side and is beaten the other way. Fix: serve only when the keeper is set, and make the keeper call “Set!” before each serve.
- Hands starting behind the body. Saves arrive late and balls bounce off the chest. Fix: start every drill with 30 seconds of “hands in front” shadow work, then check the hands before each serve.
- Parrying back into the middle. Fix: place a cone target 3 yards outside each post and award points only for parries that pass the cone.
- Standing tall and flat-footed. Fix: lower the set position by putting a cone at knee height in front of the keeper — if they stand up, they knock it over.
- Refusing to come out for loose balls. Fix: use Drill 5’s heavy-touch trigger, and reward every smother with a point, so coming out becomes a success rather than a risk.
Age adaptations
- U9–U10: handling and set position only (Drills 1 and 2), with a size 3 or 4 ball and a goal matched to the keeper’s height. No diving volume: knee-height saves and collapse saves at most, on soft grass, in sets of four. Keep serves slow and predictable.
- U11–U12: add low diving (Drill 3) in short sets of six, and introduce cut-backs at walking pace (Drill 5). Still use age-appropriate goal sizes — a keeper facing an adult-size goal learns to stand on the line and guess, which is the opposite of good positioning.
- U13–U14: add high diving (Drill 4) and full-speed cut-backs, with rebound play live. Increase the shooting distance and let servers choose the corner, so reading the shot matters as much as technique.
- U15–U16: run the full session at match tempo, with Drill 6 as the main test and servers striking from 16–18 yards. Add decision-making under fatigue: the keeper must distribute accurately after every save, as in a match.
A 45-minute session plan
- 0–8 minutes: Drill 2 handling ladder (one set each, both keepers working in pairs).
- 8–22 minutes: Drill 1 frontal shots, three-keeper rotation, six shots each.
- 22–32 minutes: Drill 3 low dives, two sets of six with full rest between sets.
- 32–45 minutes: Drill 6 shot-stopping game, two 4-minute blocks with a keeper swap. Finish with 5 minutes of light handling at walking pace — no diving to end the session.
FAQ
How often should youth goalkeepers train shot-stopping?
Twice a week inside normal team training is enough for most youth keepers: one handling and set-position session, and one diving and cut-back session, with at least a day between them. Diving is high-impact, so keep dive numbers low and never train diving on consecutive days for keepers under 14.
What size goal should a youth goalkeeper train in?
The goal the keeper plays in on match day for their age group, or the closest size available. A keeper who trains in an adult-size goal learns to stay on the line and guess; a keeper in a right-size goal learns to move, set and cover angles, which transfers to every goal size as they grow.
How do you teach a young goalkeeper not to be afraid of diving?
Build the landing before the dive. Start from the knees with gentle throws, teach landing on the hip and side of the thigh with the ball cushioned in, and only add height and pace when landings are soft and controlled. Never force a dive, and never run diving drills on hard ground.
Should a youth keeper catch the ball or parry it?
Catch whenever the shot can be held cleanly — a hold ends the attack and lets the keeper restart play. Parry only when the shot cannot be held, and always parry wide, away from the goal and away from following attackers. A parry back through the middle is the one outcome to coach out of every session.
What is the most important shot-stopping skill for a youth goalkeeper?
The set position. A keeper who is balanced, still and facing the ball when the shot is struck, with hands in front of the body, will save shots they have no right to save. Technique, diving and distribution all build on that one habit, which is why it comes first in every drill in this post.
Sources and further reading
- FIFA Training Centre, “Saving frontal shots” — the frontal-shots exercise this post’s first drill is based on, including the 15 x 20 metre setup, the 9-metre shooting line, the three-keeper rotation, and the coaching points on staying anchored at the shot and parrying wide.
- FIFA Training Centre, goalkeeper 1v1 framework (read, close, set, wait, attack) — the decision-making sequence behind Drill 5’s cut-back and heavy-touch work.
- For the rest of the keeper’s game, see our goalie drills for youth soccer and our goalkeeper distribution drills, linked in the drills above.