Football Throw-In Routines: 5 Plays to Keep Possession
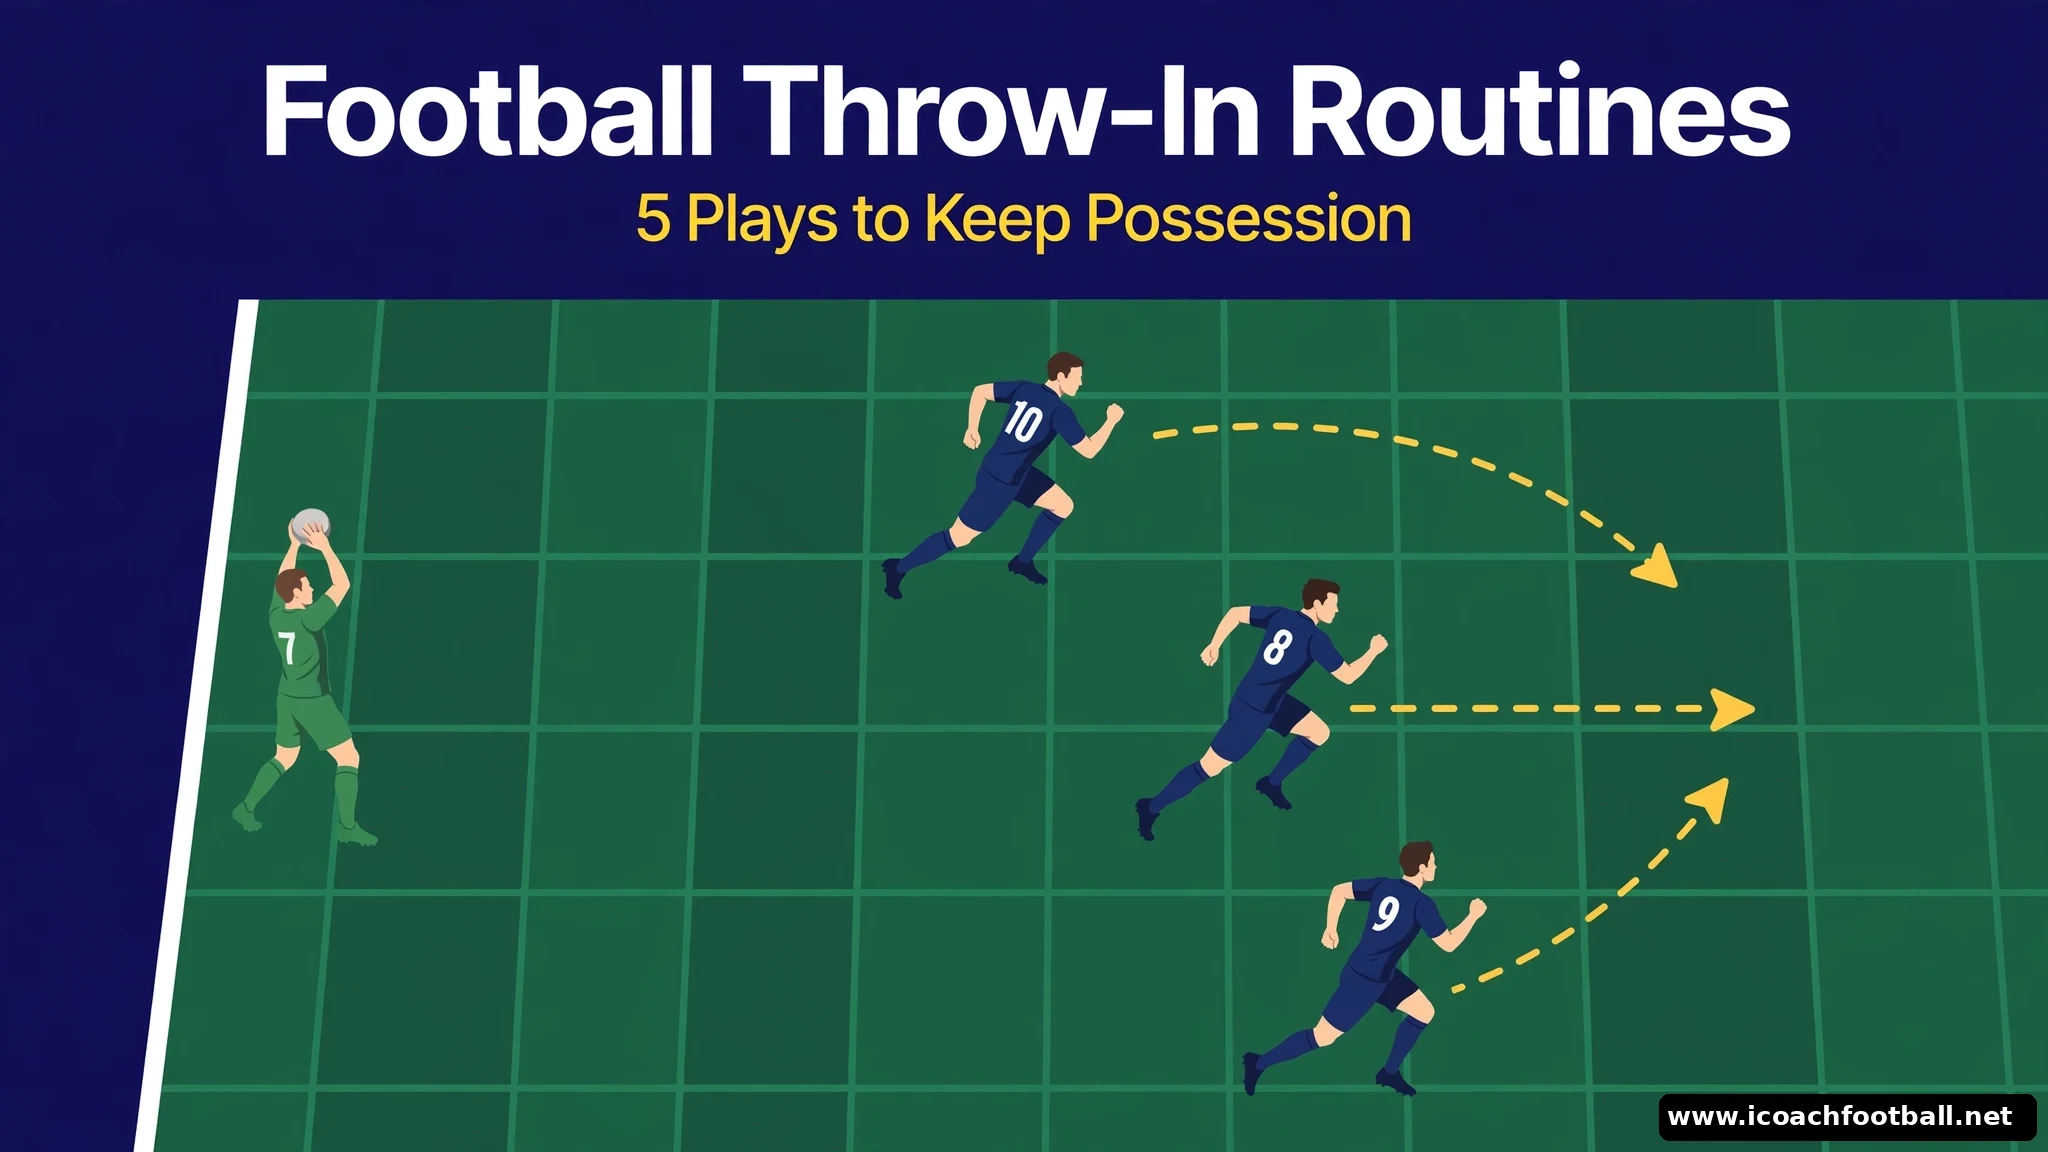
Quick answer: Pick the throw-in routine by pitch zone, not by habit. Play out in your own third, scissor and switch in the middle third, and use a flick-on or long throw in the final third. Give each routine one signal word, so players know the play before the ball is thrown.
A team gets 20 to 40 throw-ins in a match, more than any other set piece. Most of them are thrown down the line to a marked player, and possession is gone within two touches.
These five football throw-in routines fix that by giving every throw a named play for its zone of the pitch. They are match-day routines, not basic throwing technique: if your players still need the throwing and receiving basics, start with our soccer throw-in drills, then return here to add the routines. The same plays work in soccer anywhere, because the touchline, the 2-metre rule and the timing do not change. Every routine below states its zone, its signal, its starting spots and its finish, so a coach can run it from the diagram and steps alone.
Players: 12–16 (thrower, receivers, defenders, goalkeeper for Routines 1 and 4)
Area: Touchline channel, 40 x 30 yards; final-third routines use the last 30 yards to a real goal
Duration: 60 minutes (45-minute version: Routines 1, 2 and 5 only)
Focus: Zone decisions, signals, timed runs, flick-ons, second balls, quick restarts
Equipment: 8–10 balls, 12 cones, bibs, 1 full-size or age-appropriate goal
Age: U10–U16 (long throws and heading only where age guidance allows — see age adaptations)
| Time | Activity | Main objective |
|---|---|---|
| 0–8 min | Throwing technique refresher | Legal throws to feet, chest and into space |
| 8–18 min | Routine 1 | Play out from your own third |
| 18–28 min | Routine 2 | Scissor and switch in the middle third |
| 28–40 min | Routines 3–4 | Flick-on and long throw in the final third |
| 40–55 min | Routine 5 | Quick-throw game, all zones |
| 55–60 min | Reset and repeat | Best routine, both touchlines |
Choose the routine by zone
| Zone | Routine | Signal | First look |
|---|---|---|---|
| Own third | 1. Drop and Play Out | “DROP” | Dropping centre-back, then goalkeeper or far centre-back |
| Middle third | 2. Scissor and Switch | “SCISSOR” | Second receiver in the space the scissor opens |
| Final third | 3. Flick-On and Run | “FLICK” | Target forward, then the runner beyond the defence |
| Final third | 4. Long Throw: Crowd and Second Ball | “LONG” | Near-post crowd, then the second-ball zones |
| Any zone | 5. Quick Throw | No signal — speed | Nearest unmarked player, within 5 seconds |
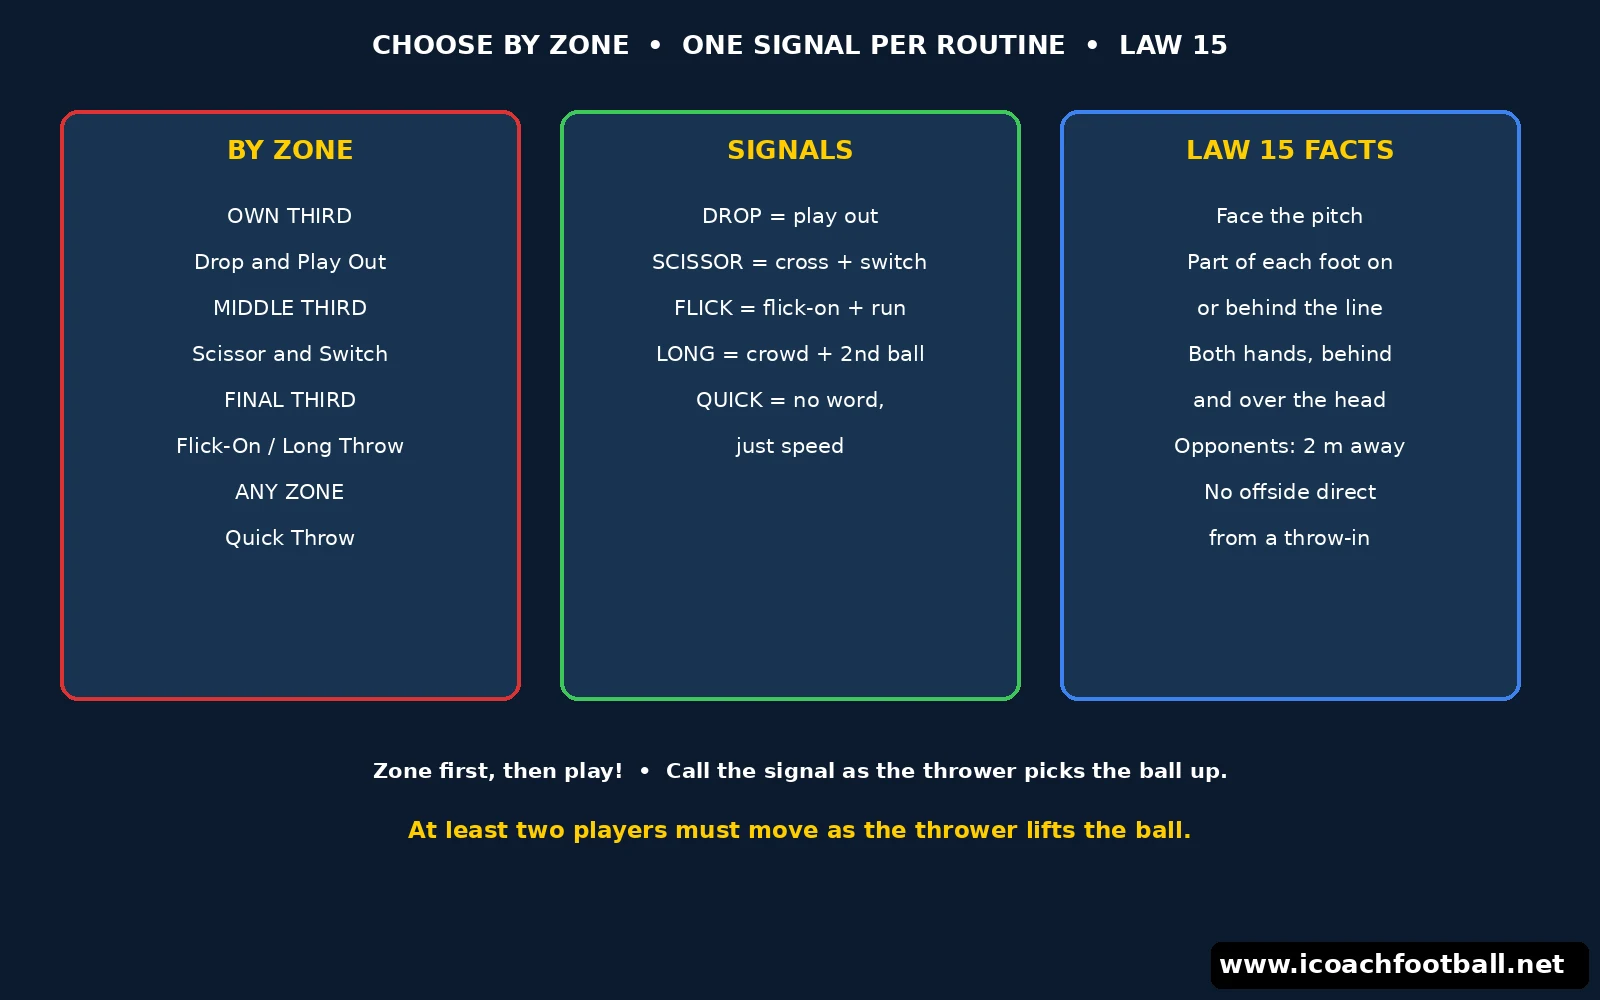
- Signals: Call the signal once, as the thrower picks the ball up. No shouting during the throw. One word is enough.
- Roles: Name one thrower per touchline before kick-off. Name the target forward and the long-throw taker before the match, not during it.
- Law 15 facts: The thrower must face the pitch, have part of each foot on or behind the touchline, and deliver the ball with both hands from behind and over the head. Opponents must stay at least 2 metres from the touchline point. A player cannot be offside directly from a throw-in. These points follow IFAB Law 15, linked at the end of this post.
- Cue: “Zone first, then play!” If players ask where the throw is, the zone decision was not made early enough.
Routine 1 — Drop and Play Out

Play out from your own third instead of clearing down the line into pressure.
- Throw-in on the touchline, level with your own penalty area.
- Centre-back drops 10 yards towards the thrower, 8 yards infield.
- Goalkeeper starts on the edge of the six-yard box, ready to receive.
- Far centre-back holds width on the opposite side of the box.
- Thrower is the full-back, with a midfielder 15 yards infield as the next option.
- The thrower calls “DROP” and throws to the centre-back’s feet.
- The centre-back takes one touch across the body, facing infield.
- The centre-back plays first time to the goalkeeper or the far centre-back, whichever is free.
- The thrower sprints wide down the touchline for the return pass.
- The team plays out through the free side, with the midfielder offering the next line.
Coach’s note: The drop must start before the throw. The cue is “Drop early, face infield!” If the centre-back receives facing the touchline, the play is already trapped.
Progressions: Add one pressing forward, then two, so the centre-back must choose goalkeeper or far centre-back under pressure.
Routine 2 — Scissor and Switch

Two receivers cross to open space, then the ball is switched through the centre to the far side.
- Throw-in on the touchline in the middle third.
- Receiver A starts 10 yards infield, receiver B 15 yards infield and 10 yards further up the pitch.
- Centre-midfielder starts central, 20 yards infield, facing the thrower.
- Far-side full-back holds the opposite touchline, level with the throw.
- Two defenders mark receivers A and B.
- The thrower calls “SCISSOR” as the ball is picked up.
- Receiver A checks short towards the thrower, dragging a defender with him.
- Receiver B crosses behind A, into the space A has just left.
- The throw goes to B’s feet, and B lays it back first time to the thrower.
- The thrower plays into the centre-midfielder, who switches first time to the far-side full-back.
Coach’s note: The scissor only works if A checks at full pace. The cue is “Cross at speed!” A slow check drags nobody anywhere.
Progressions: Receiver B turns instead of laying back, and drives infield, so defenders must respect both options.
Routine 3 — Flick-On and Run
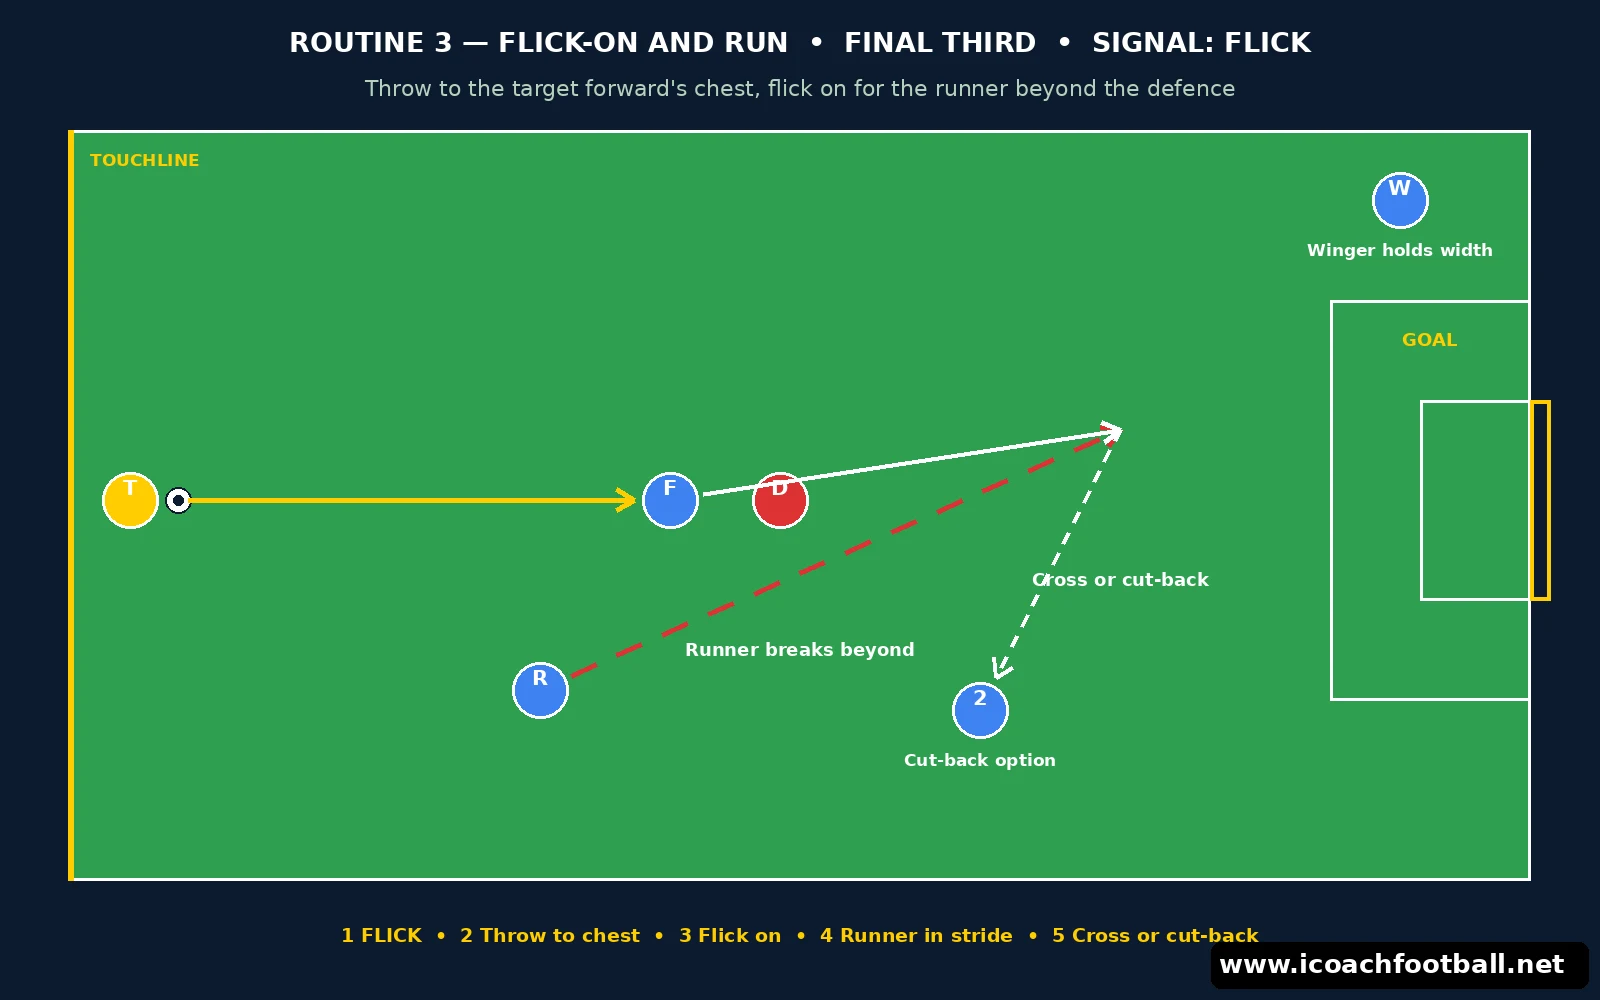
A throw into the target forward, flicked on for a runner breaking beyond the defence.
- Throw-in in the final third, 25–30 yards from goal, near the touchline.
- Target forward starts 12 yards infield, back to goal, with a defender tight behind.
- Runner starts 10 yards behind the target forward, on the blind side of the defender.
- Second runner starts on the edge of the box for the cut-back.
- Winger holds the far touchline for the switch if the flick is not on.
- The thrower calls “FLICK” and throws to the target forward’s chest.
- The target forward jumps or rises to meet the ball, chest or head, facing the thrower.
- The forward flicks the ball on, over the defender, into the space behind.
- The runner breaks beyond the defence and takes the ball in stride.
- The runner crosses first time, or cuts back to the second runner on the edge of the box.
Coach’s note: The flick must go forward, not up. The cue is “Flick it on, don’t hold it!” If the forward tries to control and turn, the runner’s space closes.
Progressions: The target forward flicks with the head only (U12+), then the runner must finish first time, and the thrower follows in for the second ball.
Routine 4 — Long Throw: Crowd and Second Ball

A long, flat throw into a crowded near post, with two players hunting the second ball.
- Throw-in in the final third, within long-throw range of the box.
- Three attackers crowd the near-post area, 6–10 yards from goal, each marked.
- One attacker starts at the penalty spot, for the flick-on.
- Two second-ball players start on the edge of the box, one each side.
- Long-throw taker starts 5 yards back from the touchline for a short run-up.
- The taker calls “LONG” and takes a short run-up along the touchline.
- The near-post crowd makes short, sharp movements to lose their markers.
- The throw comes in flat and fast, at head height, towards the near post.
- The nearest attacker flicks the ball on towards the penalty spot.
- The penalty-spot attacker attacks the flick, while the edge players attack any clearance as the second ball.
Coach’s note: The throw must stay flat. The cue is “Flat and fast!” A looping throw gives defenders time to attack it first.
Progressions: The crowd peels to the far post instead, for a back-post header, and the second-ball players swap sides so both practise arriving late.
Routine 5 — Quick Throw

Take the throw before the defence is set, and keep the ball moving for three passes.
- Any throw-in, anywhere on the pitch.
- Nearest player to the ball is the designated quick thrower.
- Two teammates start within 10 yards of the thrower, unmarked or half-marked.
- One teammate stays 15 yards infield as the safe option.
- One defender starts 2 metres from the touchline point, as Law 15 requires.
- The nearest player picks the ball up at once — no waiting for the named thrower.
- The throw is taken within 5 seconds, to the nearest unmarked teammate.
- The receiver plays one touch to the safe option infield.
- The thrower steps infield and offers the next pass, so play flows forward.
- The team must complete three passes before the defence is fully set.
Coach’s note: Quick only beats slow if the receiver is ready. The cue is “Ball up, move now!” Freeze any group that waits for the thrower to be ready.
Progressions: The defence starts closer and can press at once, so the quick throw must go to the safe option, not the nearest player.
Coaching points that decide throw-ins
- Zone first. The same throw in your own third and in the final third needs a different play. Decide the zone, then the routine.
- One signal, one play. Three or four signals is enough. A signal nobody remembers is worse than no signal.
- Throw to feet or into space. A throw at chest height to a marked player is a turnover. Throw where the receiver is going, not where he stands.
- Movement before the throw. At least two players must move as the thrower lifts the ball. Static receivers are marked receivers.
- Second ball is a position, not luck. In final-third routines, always leave players on the edge of the box for the clearance.
Common mistakes — and the fix
- Throwing down the line by default. Fix: ban the down-the-line throw for one training game, so players must use the drop, the scissor or the switch.
- Foul throws under pressure. Fix: slow every routine down until both feet stay down and the ball comes from behind the head, then add pressure back.
- Everyone watching the thrower. Fix: receivers move on the signal word, not on the throw. Freeze any receiver who stands still.
- Long throw every time. Fix: the long throw is one routine, for one zone. Use it only when the signal is called and the crowd is set.
- No cover after the throw. Fix: the thrower steps infield at once and one teammate stays behind the ball, so a lost throw does not become a counter-attack.
Age adaptations
- U10: Routines 1, 2 and 5 only, with short throws to feet. No long throws, no heading. Use a smaller area so distances stay realistic.
- U11–U12: Add Routine 3 with chest flicks only, and Routine 4 as a short throw to the near post, not a long throw. Introduce limited heading only from U12, with a lightweight ball and few repetitions, in line with the heading safety guidance in our near-post run heading drill.
- U13–U14: Full five-routine menu, both touchlines, with live defenders and the quick-throw game. Add the choice between flick-on and switch from the same starting picture.
- U15–U16: Let players read the defence and call the routine themselves, vary signals mid-game, and add a second-ball routine from a rehearsed rebound position. Our switching play drills build the far-side habits Routine 2 relies on.
A 45-minute session plan
| Time | Activity | Main objective |
|---|---|---|
| 0–8 min | Throwing technique refresher | Legal throws to feet and into space |
| 8–20 min | Routine 1 | Drop and play out |
| 20–32 min | Routine 2 | Scissor and switch |
| 32–45 min | Routine 5 | Quick-throw game, both touchlines |
Frequently asked questions
What is the best throw-in routine for youth teams?
Start with Drop and Play Out in your own third and the Quick Throw everywhere else. Both need only one signal word and teach players to keep the ball from a restart.
How far must opponents stand from a throw-in?
Opponents must stand at least 2 metres (2 yards) from the point on the touchline where the throw-in is taken, until the ball is in play, under Law 15.
Can a player be offside from a throw-in?
No. A player cannot be offside directly from a throw-in, which is why runners can start beyond the last defender in final-third routines.
What makes a throw-in illegal?
A foul throw is a throw that breaks Law 15: a foot lifting off the ground, feet inside the touchline, a one-handed throw, or a ball not delivered from behind and over the head. The throw is then taken by the other team.
Should every throw-in be a rehearsed routine?
No. Use a named routine when the defence is set and the zone suits it. When the defence is not set, take the Quick Throw and attack the space before it closes.
Sources and further reading
The FA, IFAB Laws of the Game 2026-27, Law 15 — The Throw-in: the procedure, the 2-metre rule, and that a goal cannot be scored directly from a throw-in. The routines in this post are training-ground plays built around that procedure; no routine here is claimed as approved by or affiliated with FIFA, UEFA or The FA.
FIFA Training Centre, France U17 men, Wednesday session: Set pieces — academy set-piece preparation built on early organisation, named zones and rehearsed routines. The zone-and-signal approach in this post is in line with that session; it is not a copy of it, and no affiliation is claimed.
For the throwing and receiving technique behind these routines, see our soccer throw-in drills, our switching play drills and our passing drills, linked above.