Mastering the Driven Pass: Coaching Technique & 5 Drills

The driven pass (often called a “ping” or “low drive”) is the hallmark of elite distribution. Unlike a standard side-foot pass, the driven pass travels at high speed, cuts through grass, and bypasses defensive lines before the opponent can react.
As a UEFA Pro Coach, I teach this as a weapon. It is not just a pass; it is an attack. If your center-backs can hit a 40-yard driven pass to a winger’s feet, you eliminate the entire opposing midfield in one second.
This guide breaks down the exact biomechanics of the technique and provides 5 progressive drills to master it.
Part 1: The Biomechanics (How to Coach It)
Before drills, players must understand the mechanics. If the technique is wrong, the ball will bobble or float.
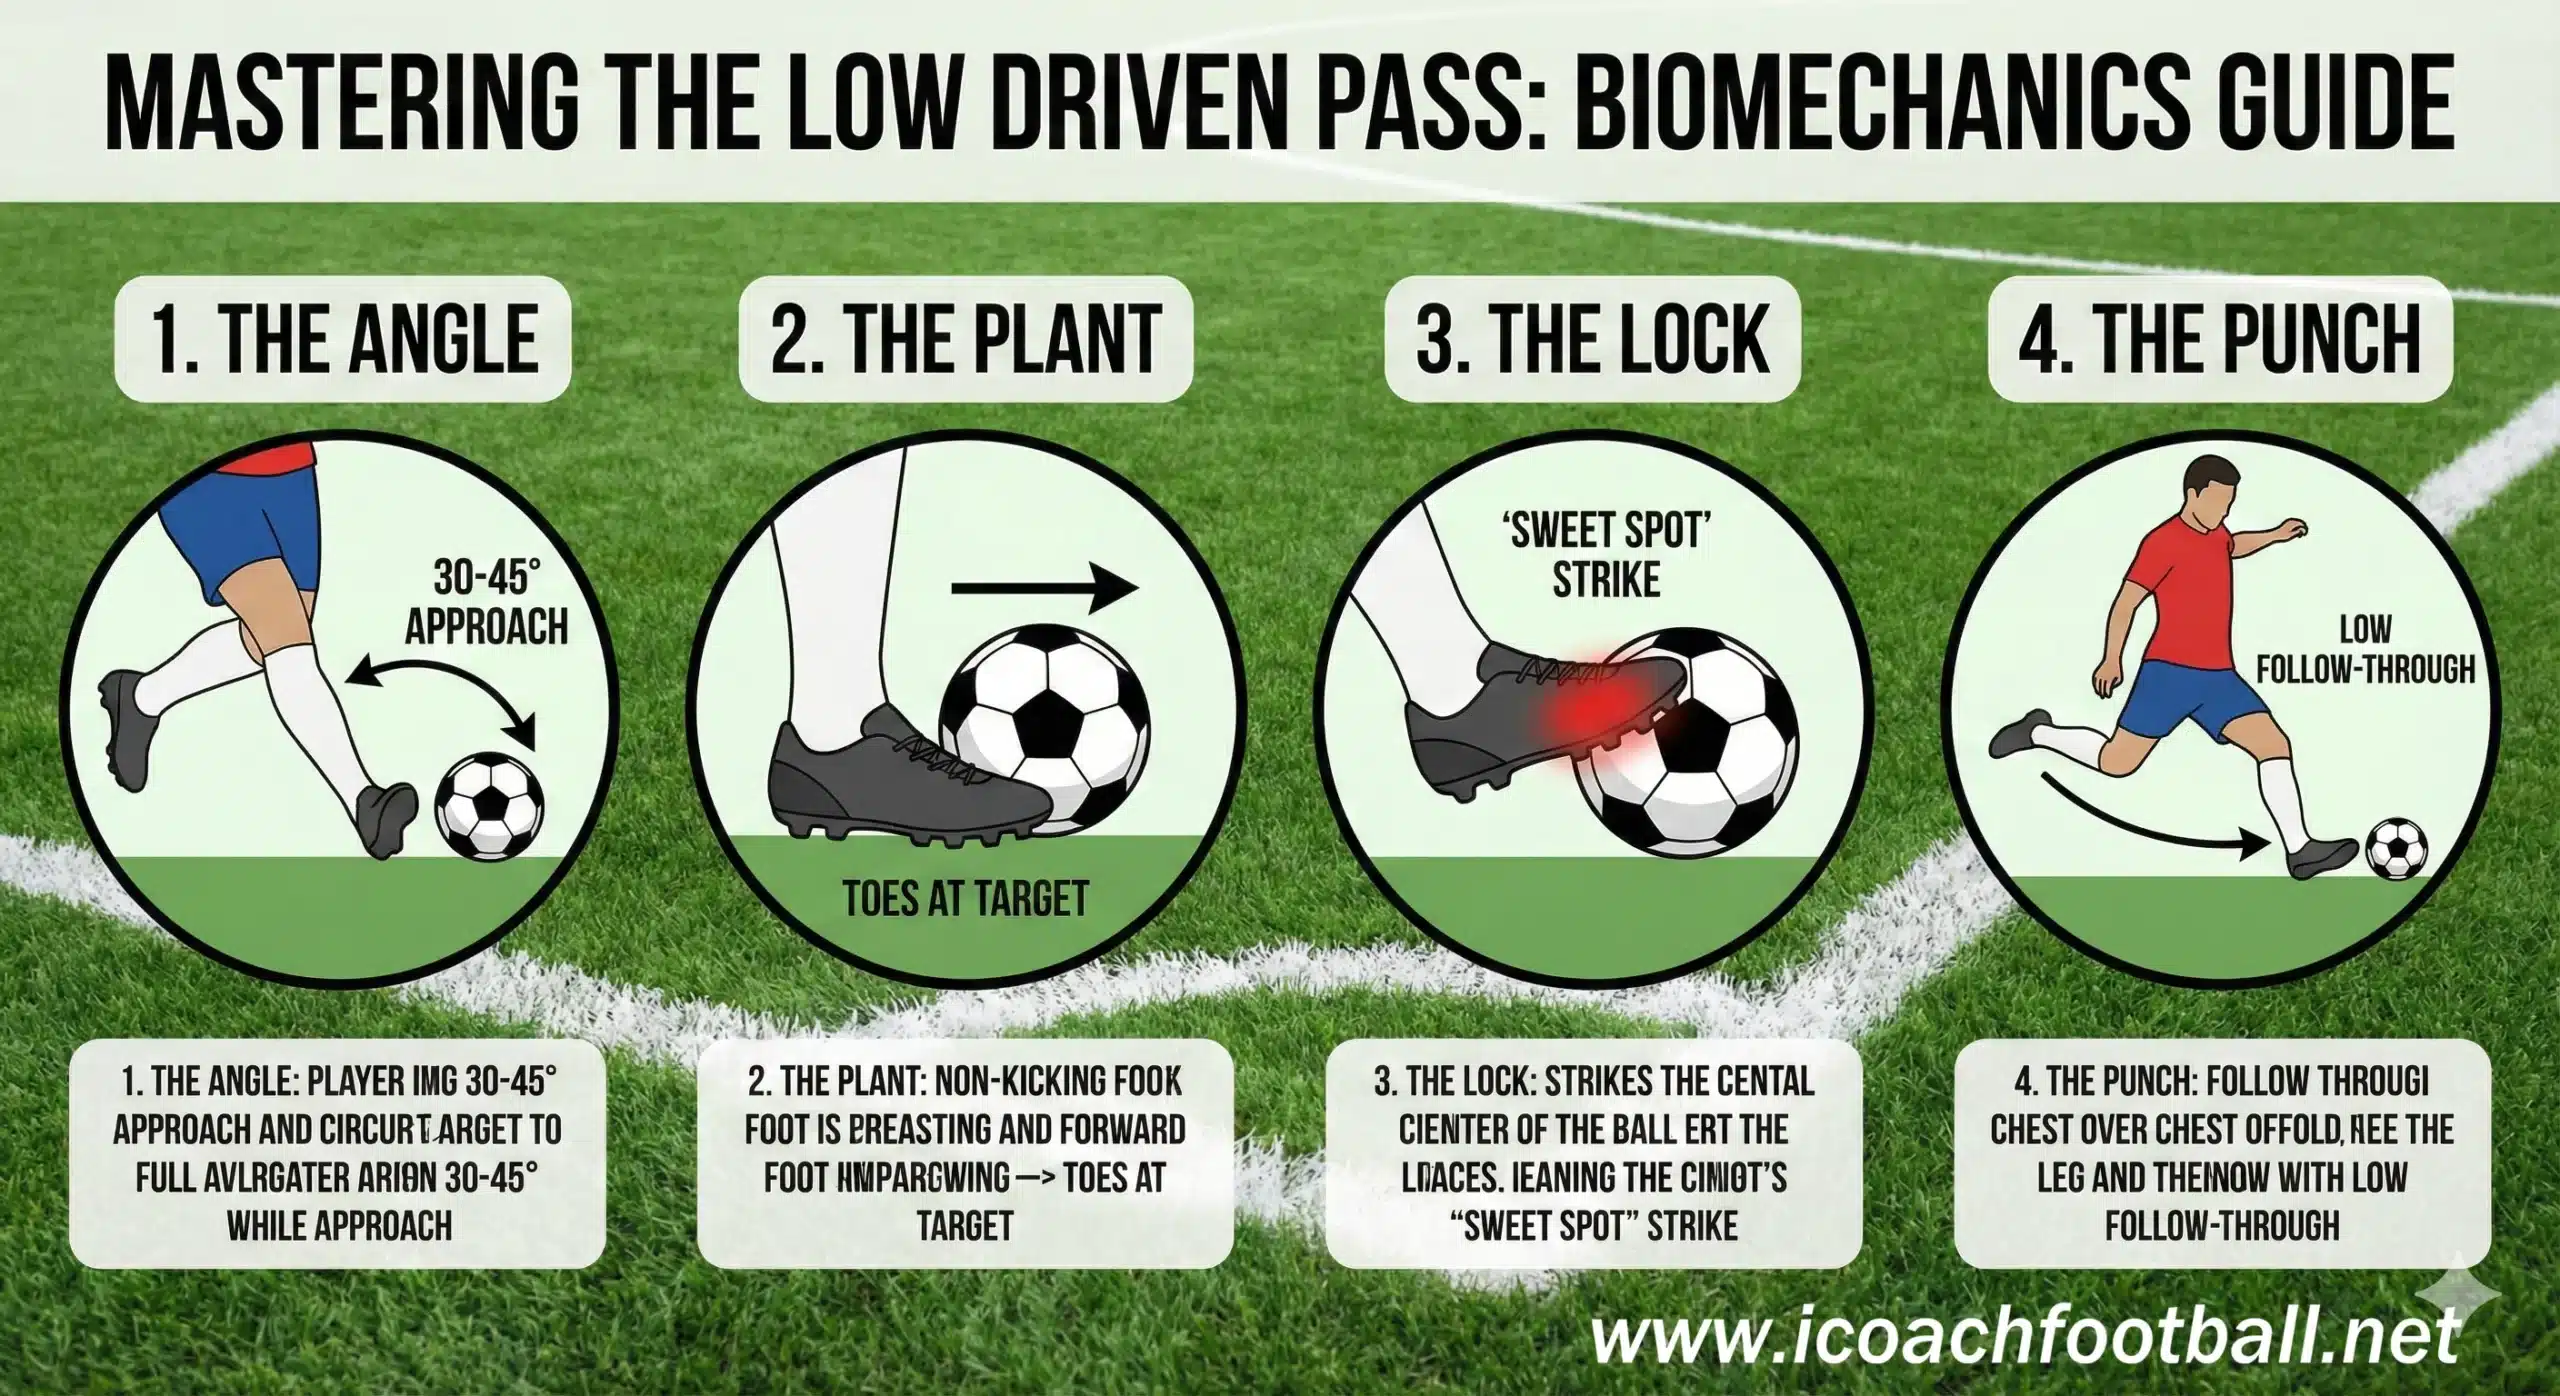
The 4 Steps to Perfection:
- The Angle: Approach the ball at a 30-45 degree angle (not straight on). This opens the hips.
- The Plant: Place the non-kicking foot next to the ball (not behind it). The toes must point at the target.
- The Lock: Point the toes down and lock the ankle. Strike the center of the ball with the “sweet spot” (the hard bone on top of the foot).
- The Punch: Follow through low and “punch” the ball. Do not lean back. Keep the chest over the ball to keep it on the ground.
Drill 1: “Gate Golf” (Technical Isolation)
We start with zero pressure to dial in the mechanics.

Setup:
- Grid: 30-yard channel.
- Equipment: Two cones (The Gate) placed 20 yards away, 2 yards wide.
- Players: Pairs.
Instructions:
- Player A strikes a driven pass through the gate to Player B.
- The ball must not bounce before it passes the gate. It must “zip” along the grass.
- Player B controls and repeats.
- Competition: How many successful passes through the gate in 2 minutes?
Coaching Point: Listen to the sound of the contact. A “thud” is good (laces). A “slap” is bad (inside of foot).
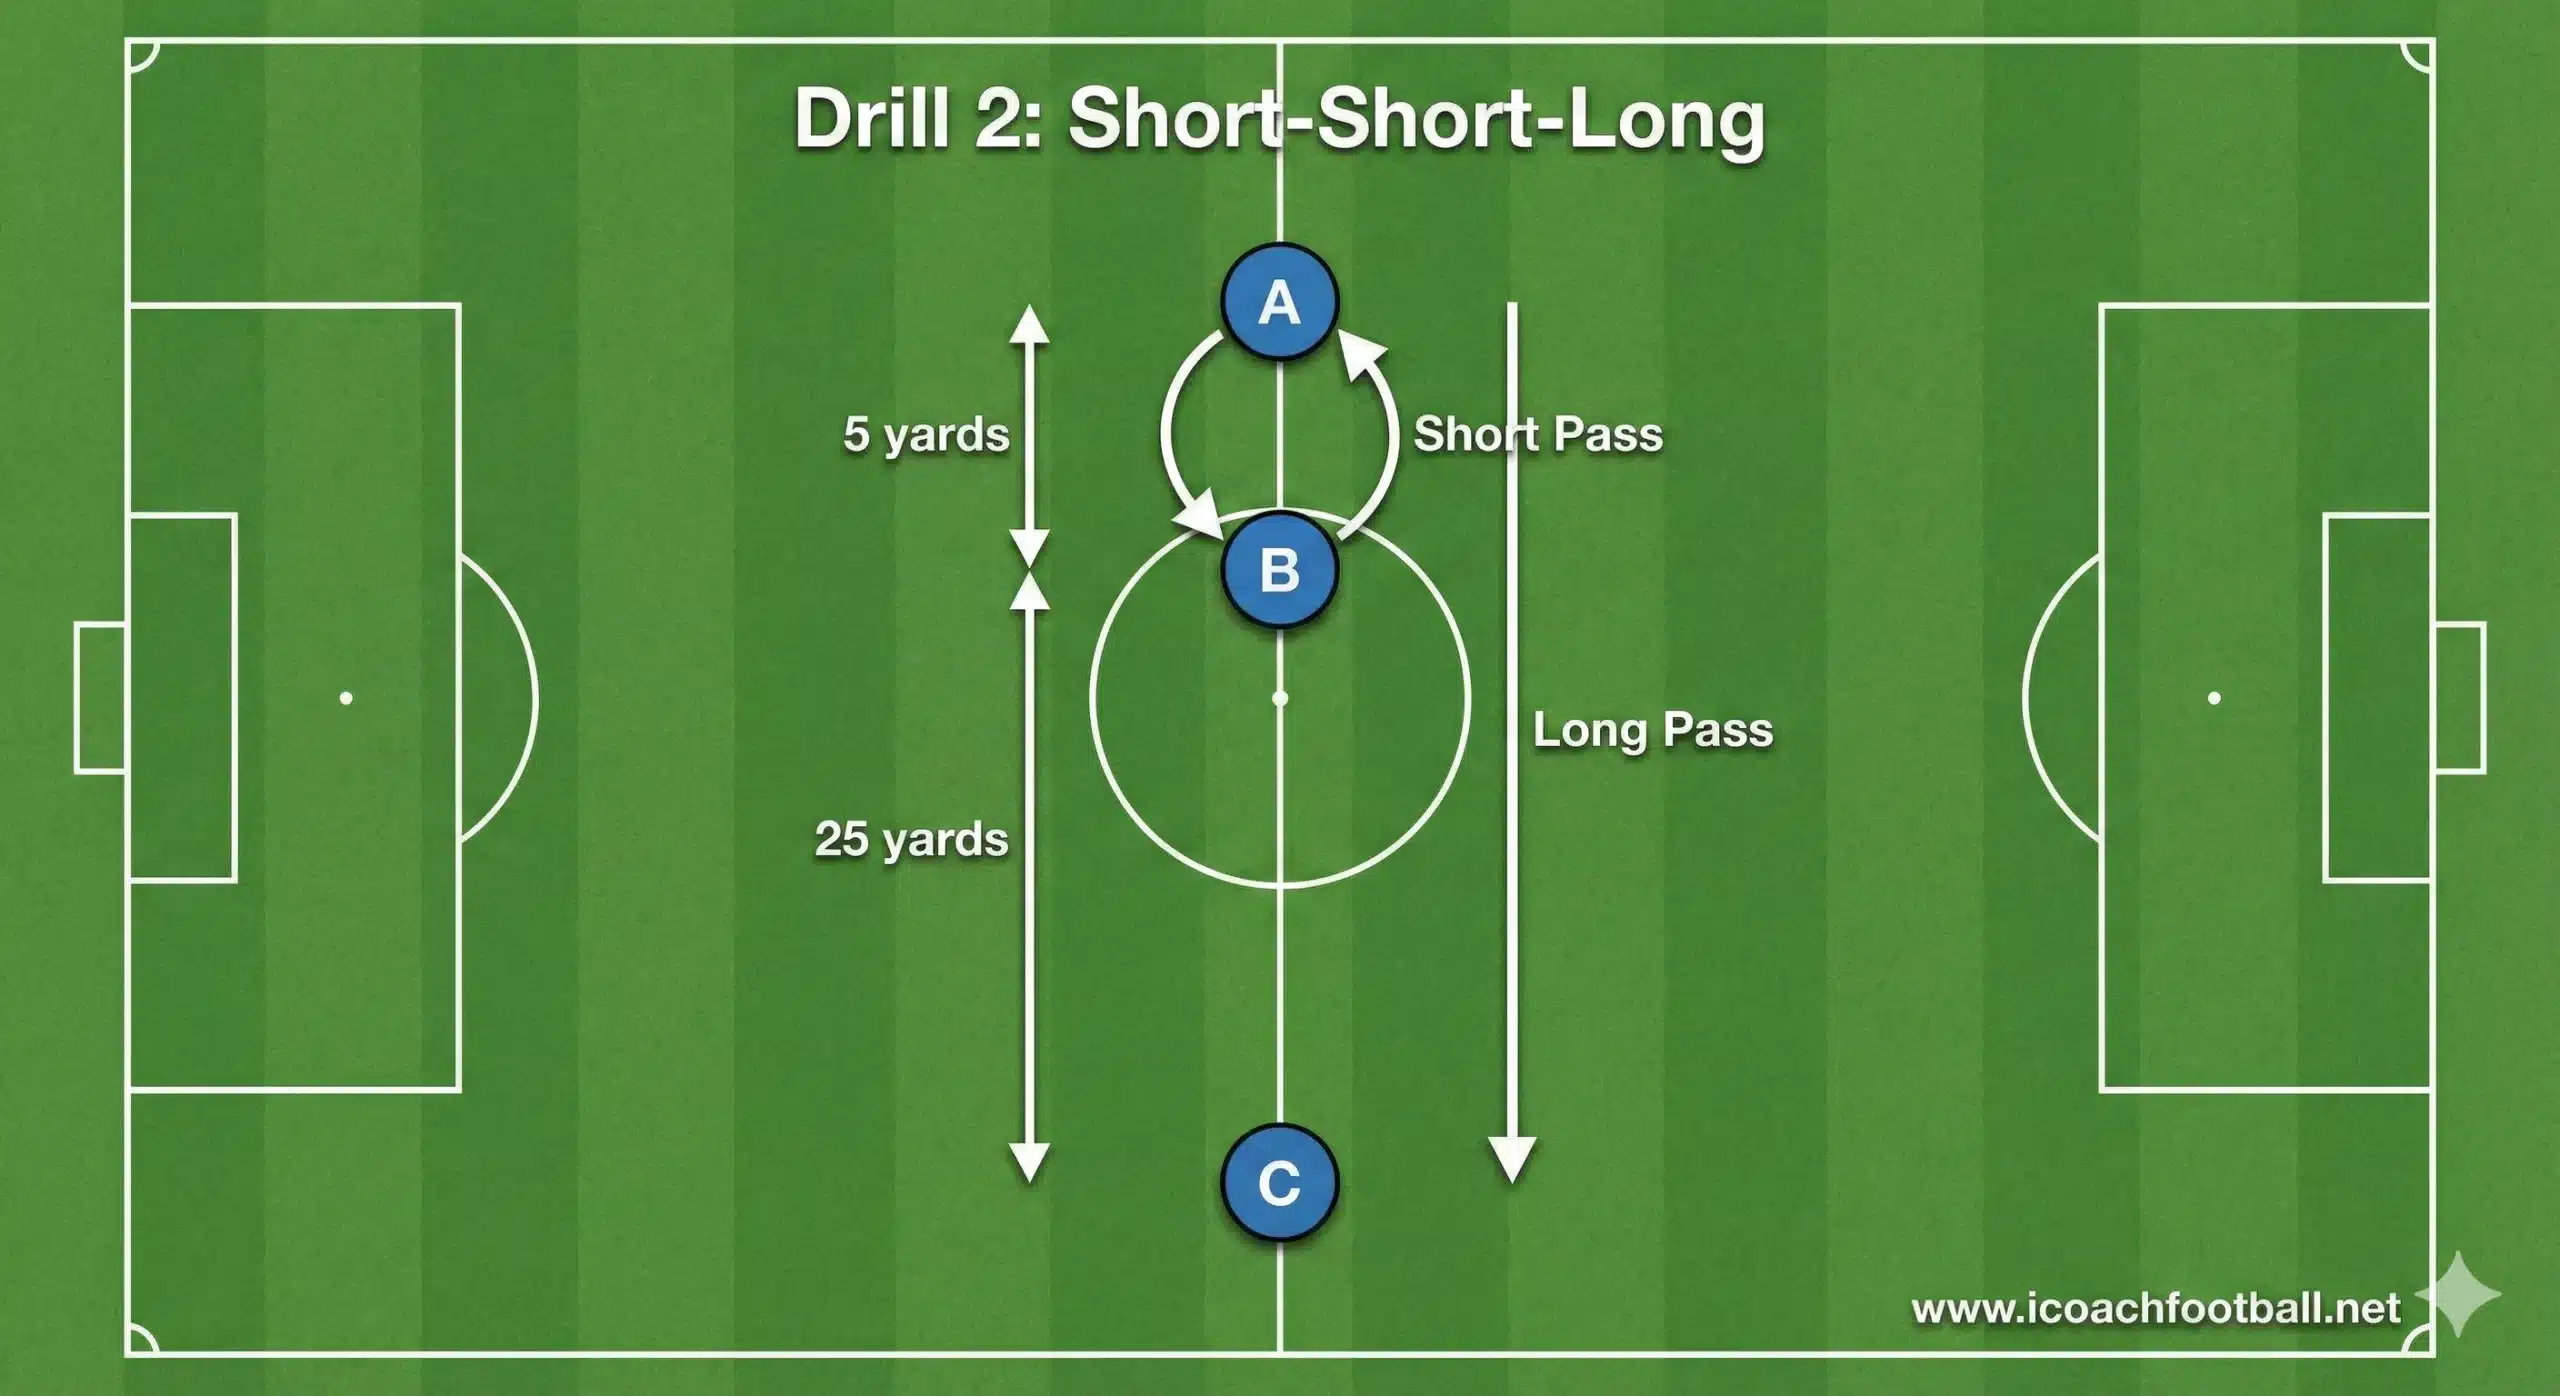
Drill 2: Short-Short-Long (Variable Distance)
In a game, players rarely hit long passes repeatedly. They combine short, then go long.
Setup:
- Grid: 3 players in a straight line.
- Distance: Player A and B are 5 yards apart. Player C is 25 yards away.
Instructions:
- Player A plays a short pass to Player B.
- Player B plays a short wall pass back to Player A.
- Player A takes one touch to set the ball out of their feet and hits a Driven Pass to Player C.
- Player C controls and restarts the pattern from their end.
Coaching Point: The “Set Touch” (Step 3) is crucial. It must be diagonal to allow the run-up angle.
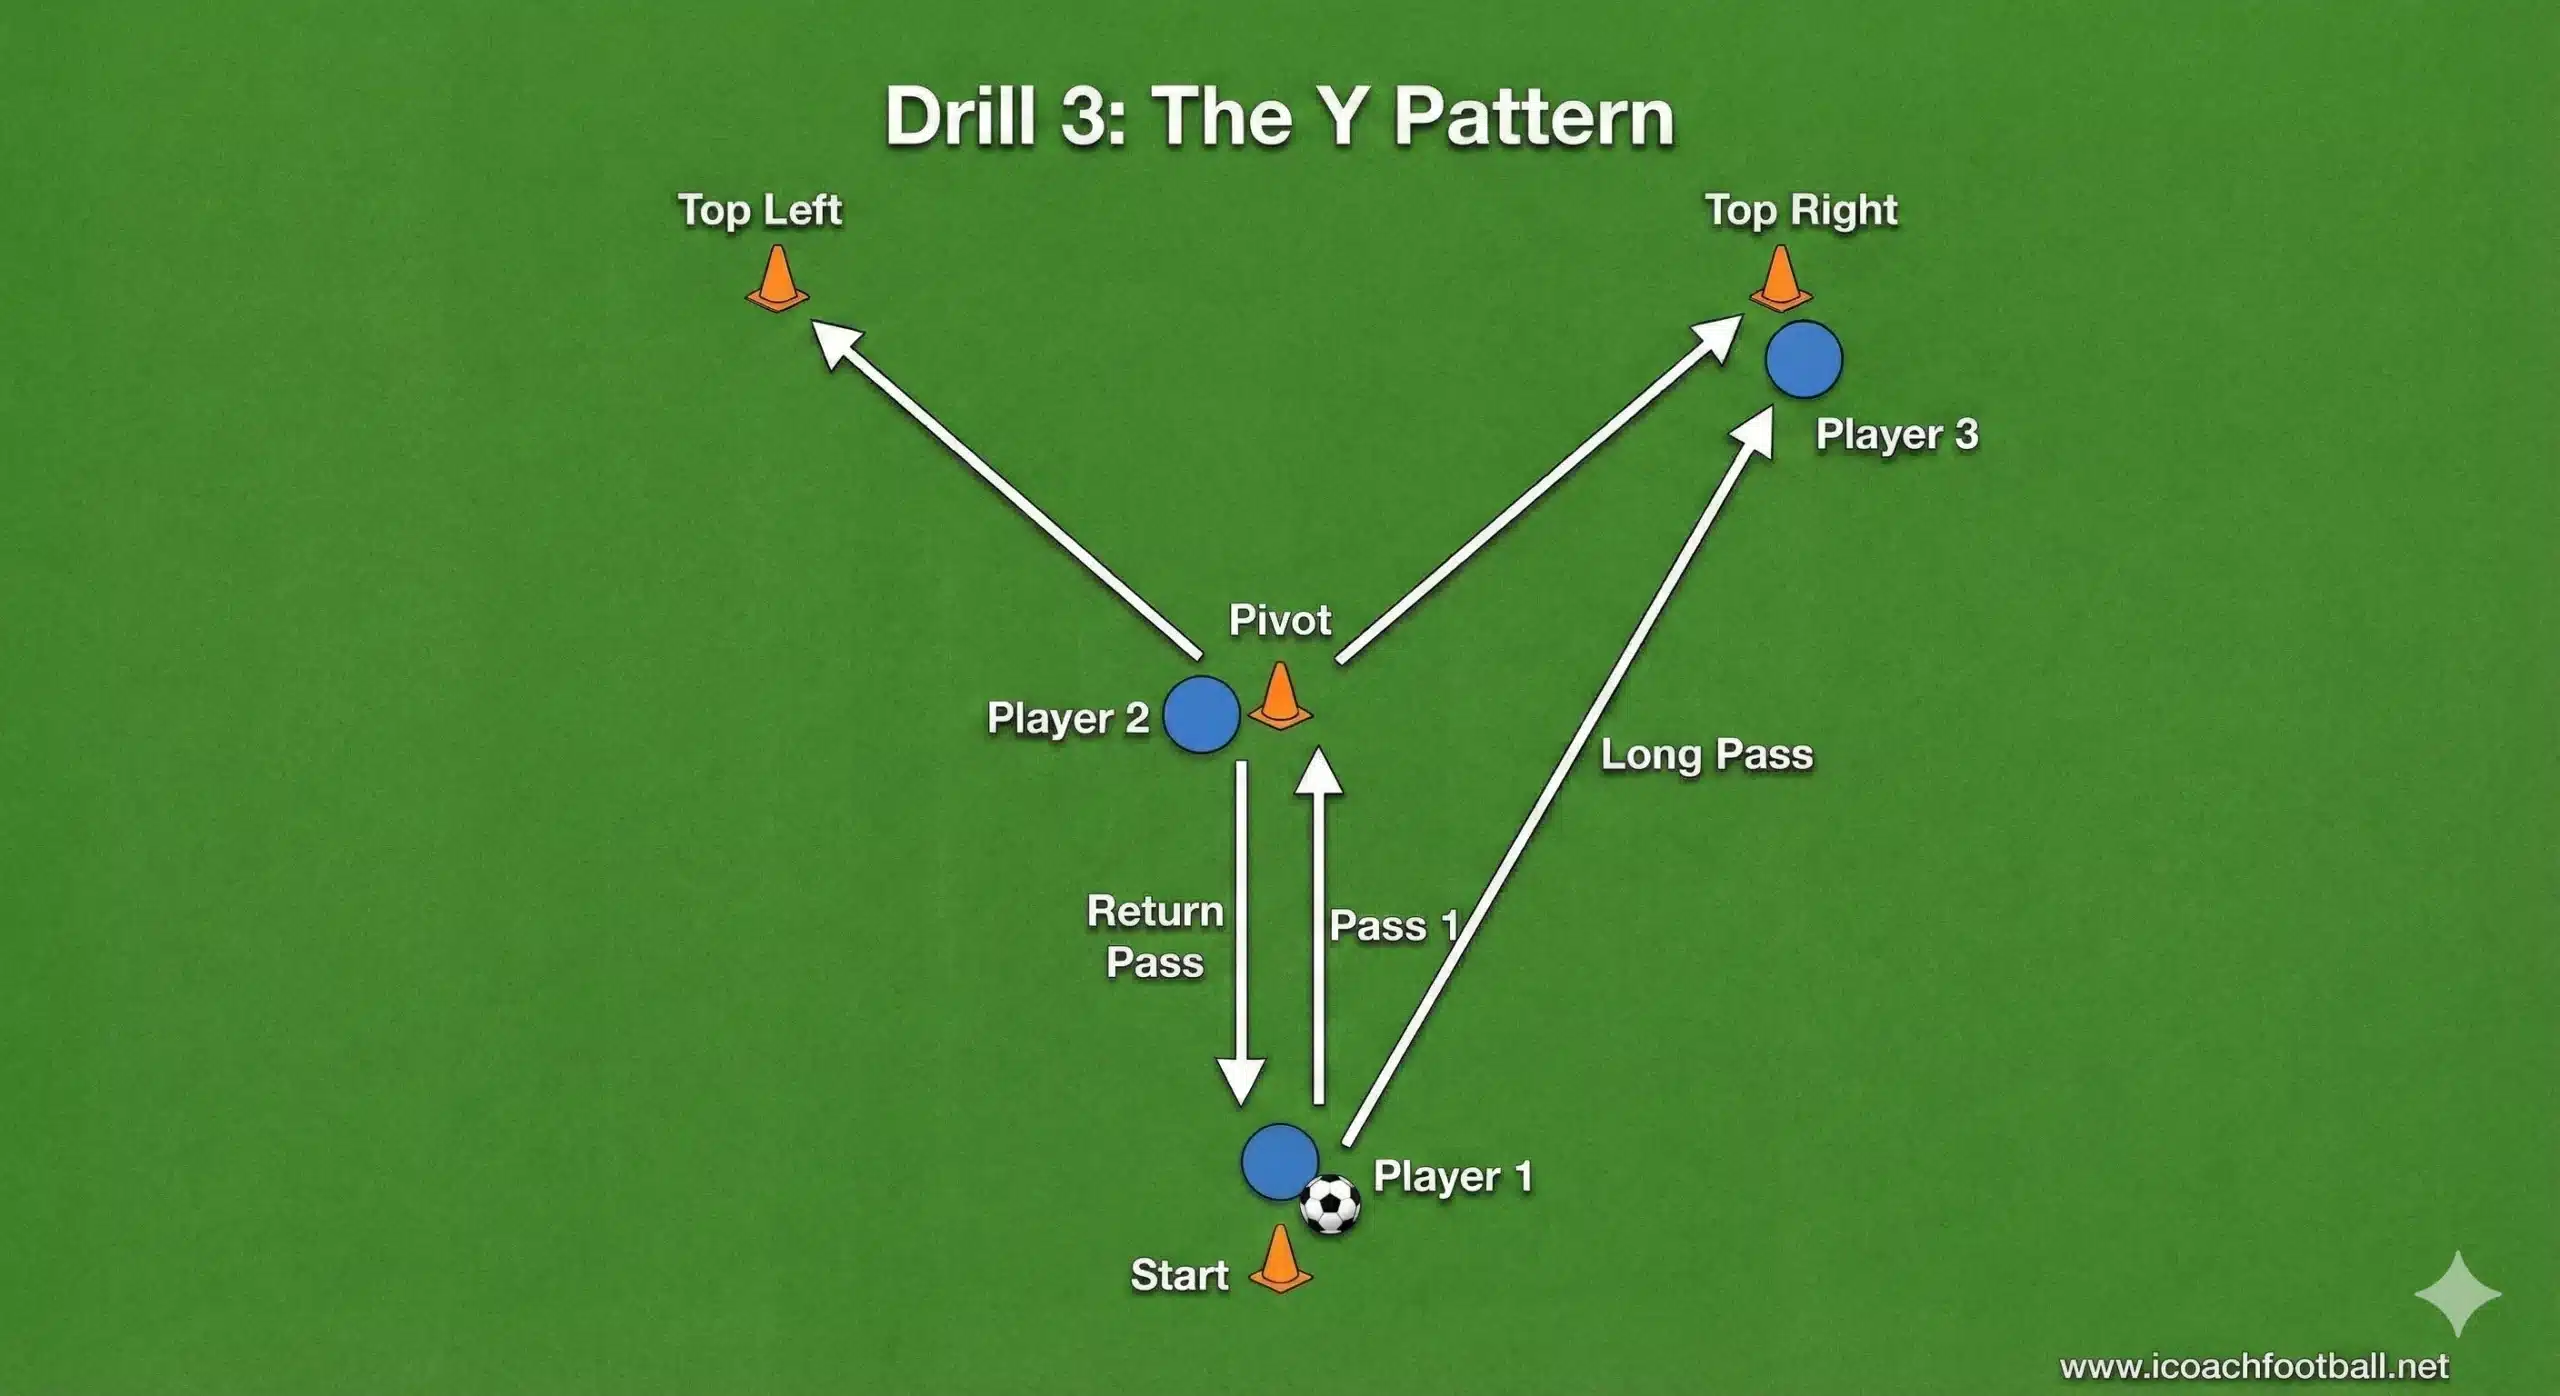
Drill 3: The “Y” Passing Pattern (Angles)
This mimics a Center Back playing to a Full Back or Winger.
Setup:
- Cones: Set up cones in a “Y” shape.
- Cone A (Start).
- Cone B (Central Midfield) – 10 yards away.
- Cones C & D (Wingers) – 25 yards away split wide.
Instructions:
- Player at A passes to B.
- B lays it off (bounces it back) to A at an angle.
- A runs onto the ball and hits a driven pass to C or D.
- Rotate positions: A->B->C/D->A.
See More Y-Passing Drills Variations: 9 Y Passing Drills Variations
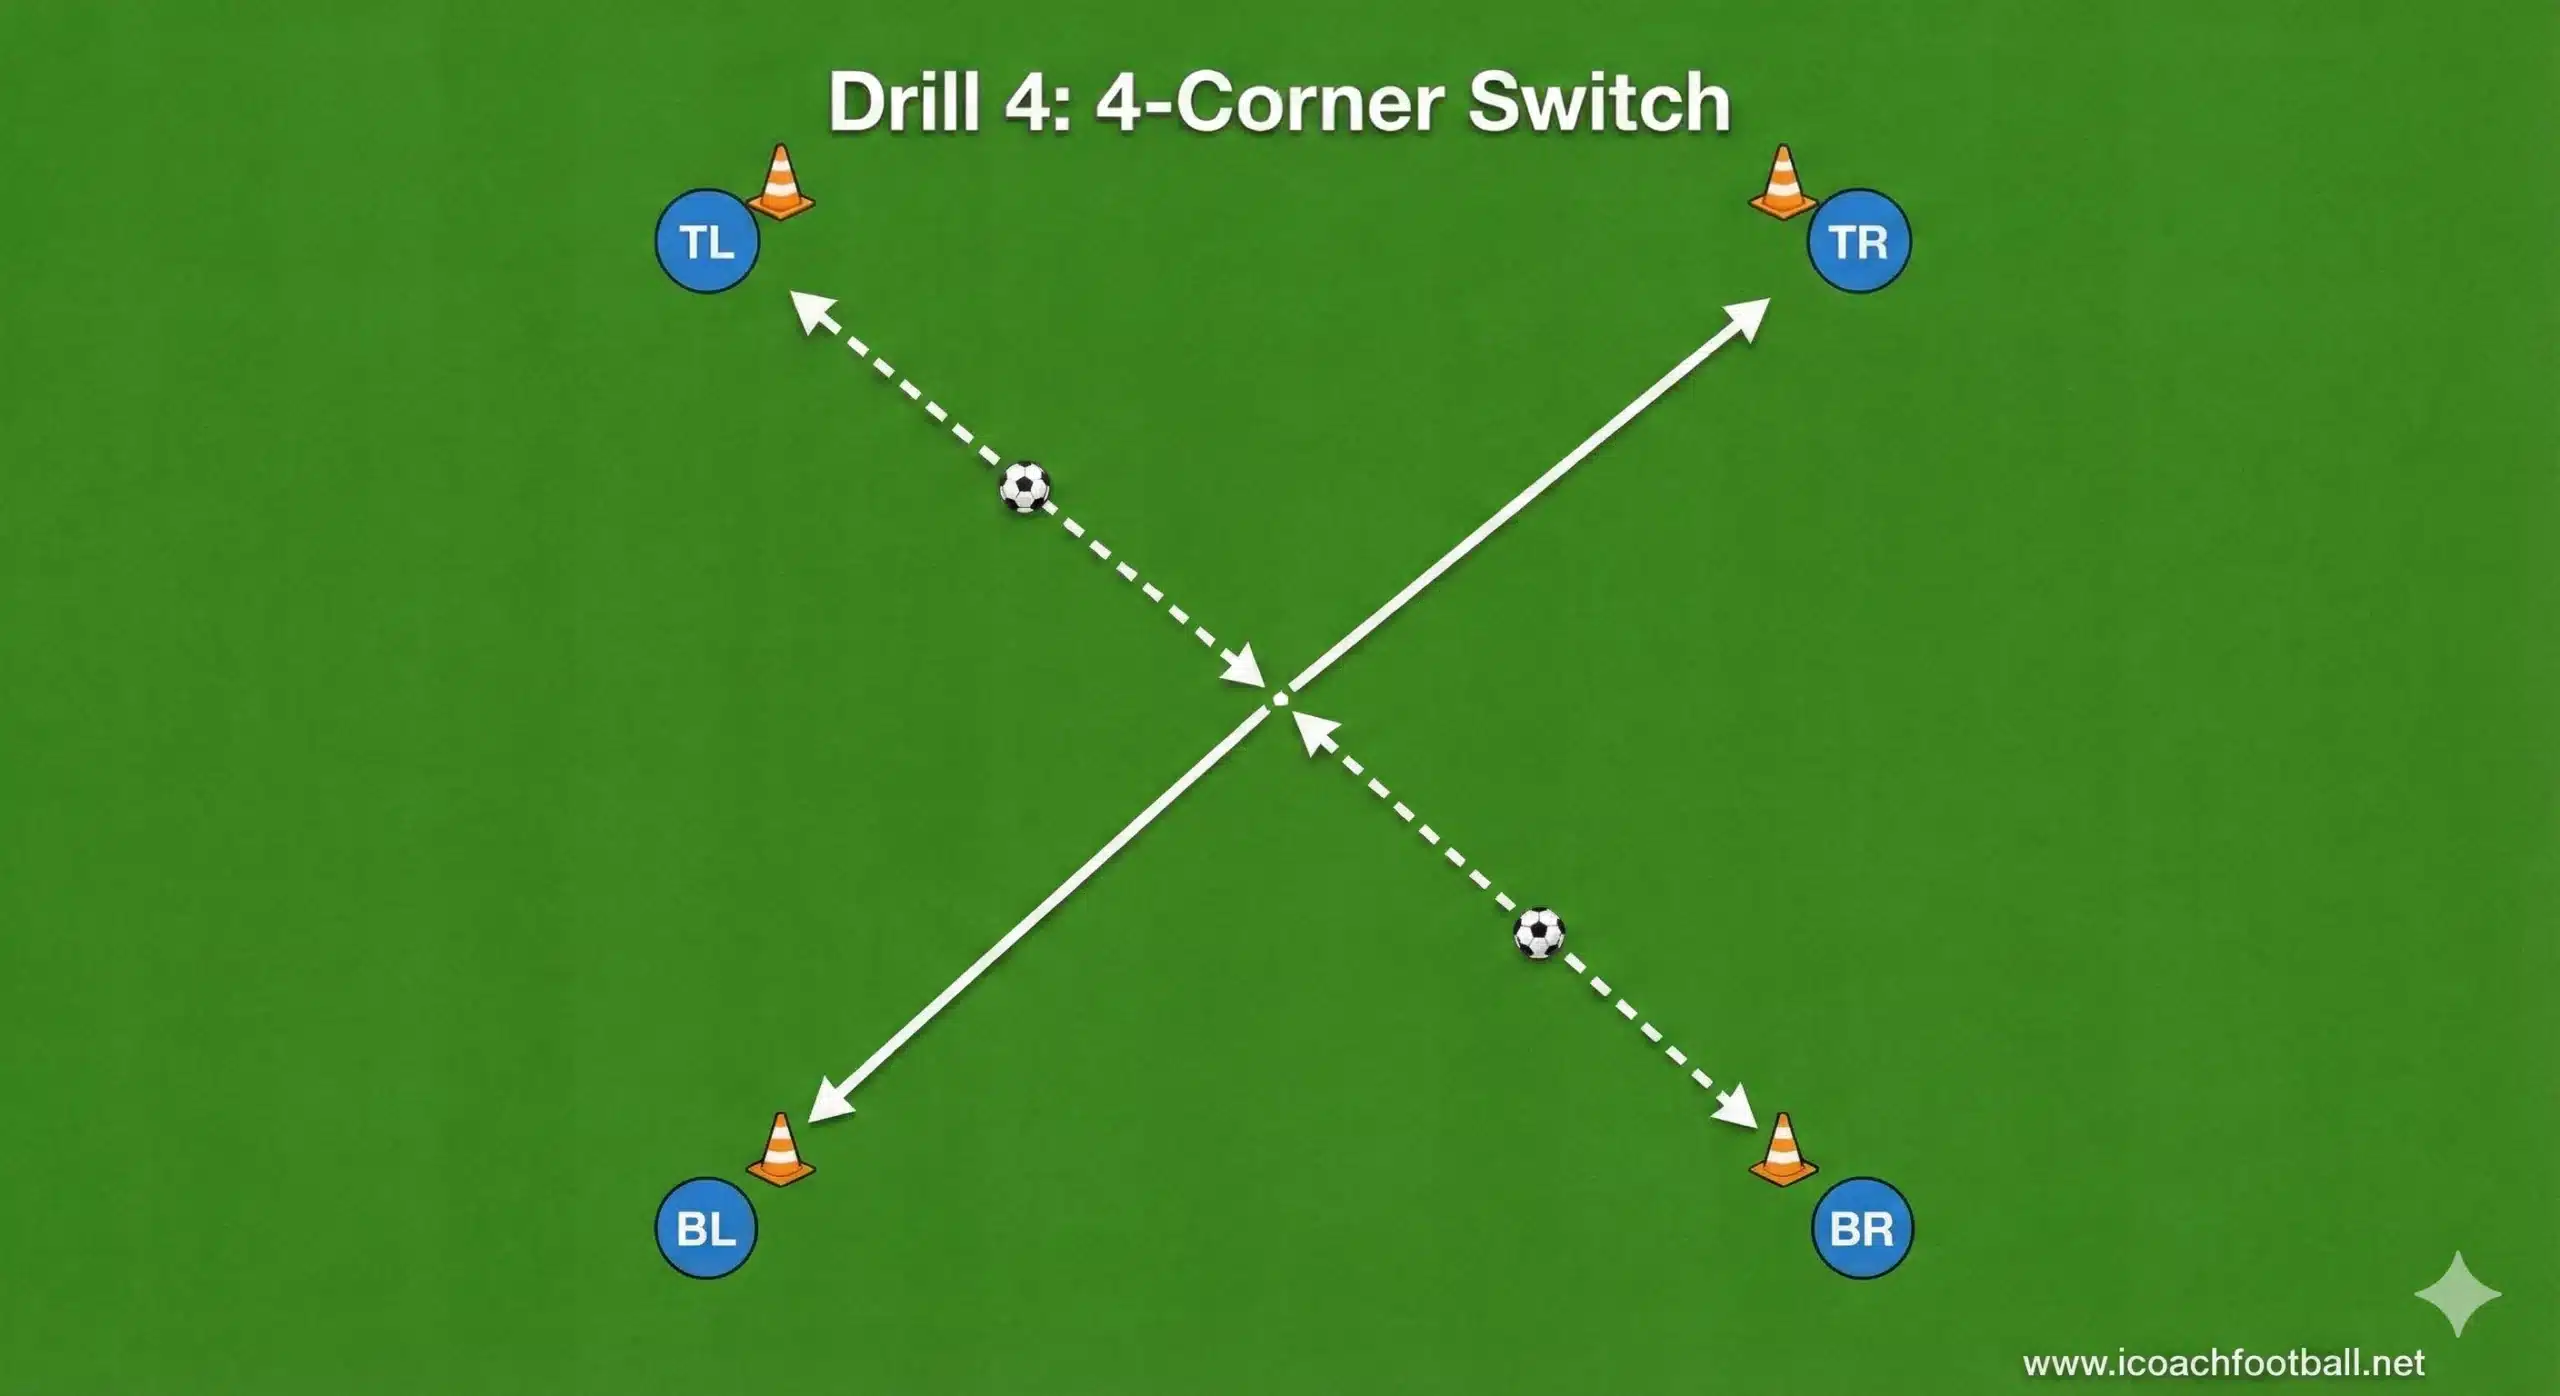
Drill 4: The 4-Corner Switch (Movement)
Now we add movement and scanning.
Setup:
- Grid: 30×30 yard square.
- Players: 4 players, one in each corner. 2 balls starting at opposite corners.
Instructions:
- The two players with balls dribble toward the center.
- They perform a turn (e.g., Cruyff turn) and pass back to the corner they came from? NO.
- The Switch: They look up and hit a driven pass across the grid to the player to their right.
- Speed is key. Can the ball arrive before the player reaches the cone?
Drill 5: Breaking the Lines Game (Opposed)
Applying the skill against defenders.
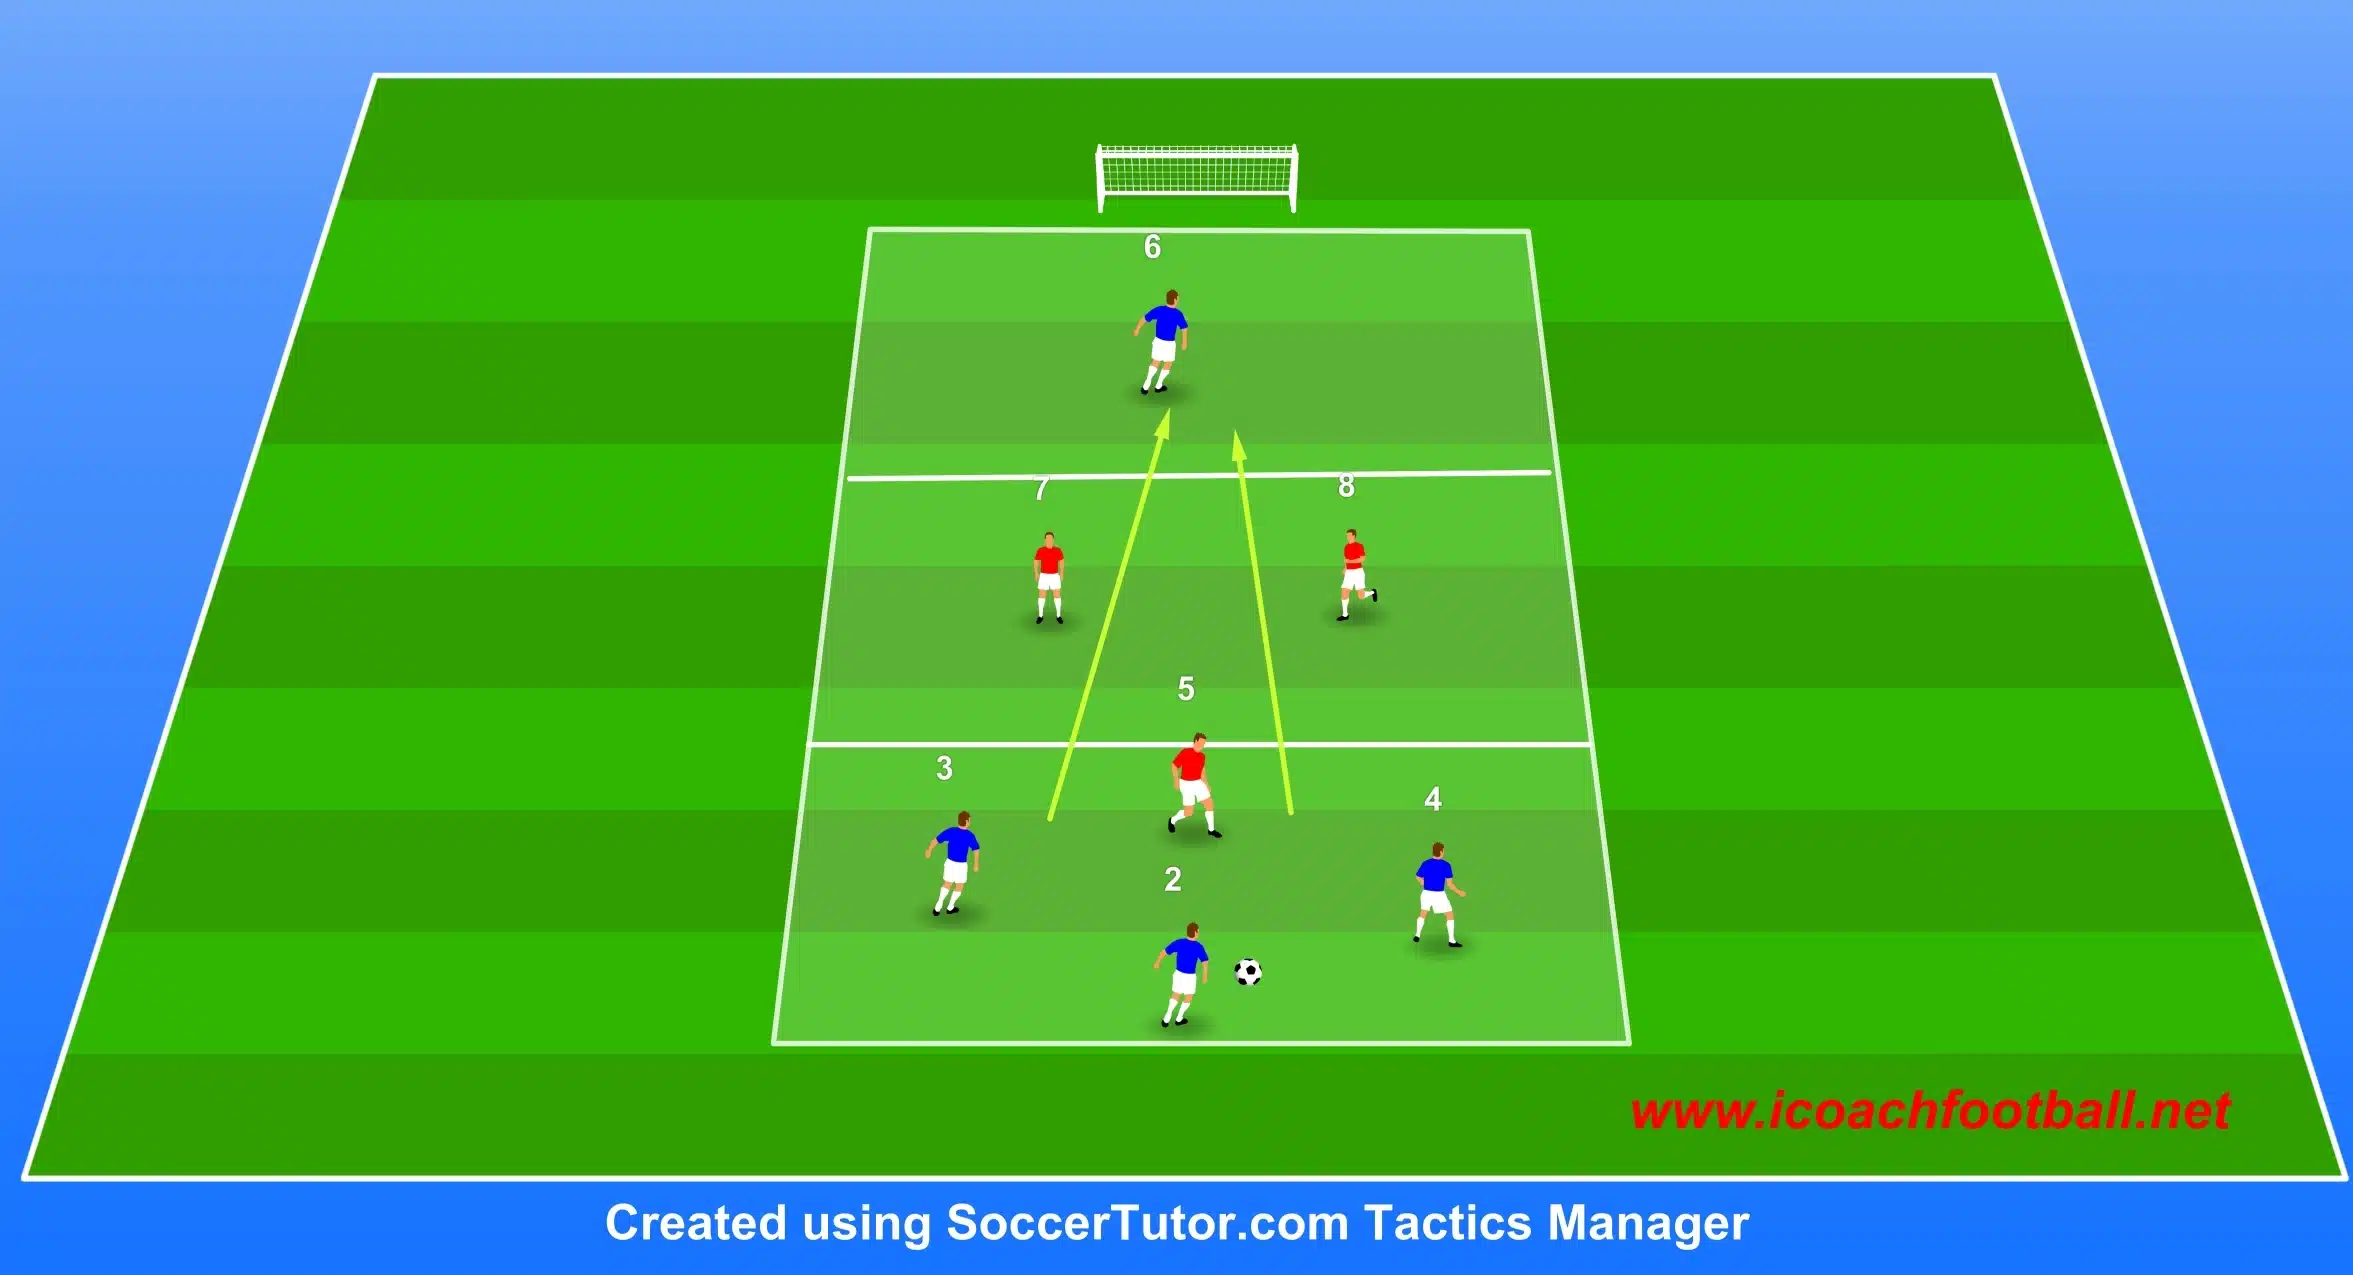
Setup:
- Grid: 40×20 yards, divided into 3 zones (Defensive, Middle, Attacking).
- Teams: 3v1 in Defensive Zone, 2 Defenders in Middle Zone, 1 Striker in Attacking Zone.
Instructions:
- The 3 Defenders keep possession against 1 attacker.
- The Goal: They must spot a gap in the Middle Zone and hit a Driven Pass through the 2 midfielders to the Striker.
- The Striker finishes in a mini-goal.
- Lofted balls over the top are not allowed (forces the low driven technique).
Summary: When to use the Driven Pass?
- To Switch Play: Moving the ball from left back to right wing instantly.
- To Break Lines: Passing past the opponent’s midfield to a striker’s feet.
- Not for: Short distances or delicate through-balls (too much power).
- ➡️ Recommended: Combine this with our Switching Play Drills to see this technique in tactical action.
FAQ: Driven Pass Technique
Why does my pass keep rising in the air?
You are leaning back. To keep the ball low, you must keep your chest/head over the ball at the moment of contact. Think “nose over toes.”
How do I generate more power?
Power comes from speed of swing, not muscle size. Focus on a fast “snap” of the lower leg from the knee down, and ensure your ankle is locked solid.
What part of the foot should I use?
Use the “laces” (instep). Specifically, the hard bony ridge at the top of your foot. Do not use the inside of the foot, as it generates spin and less power.
How to Coach the Driven Pass (Technical Steps)
Step 1: The Angle. Ensure the player approaches the ball at 30-45 degrees to open their hips.
Step 2: The Plant. Place the non-kicking foot 6 inches from the ball, toes pointing at the target.
Step 3: The Strike. Lock the ankle (toes down) and strike the center of the ball with the laces.
Step 4: The Follow-Through. Punch through the ball low, keeping the chest forward to prevent loft.


