9 Y Passing Drills (Animated): The Ultimate Soccer Passing Pattern
The “Y Passing Drills” is the Swiss Army Knife of midfield training.
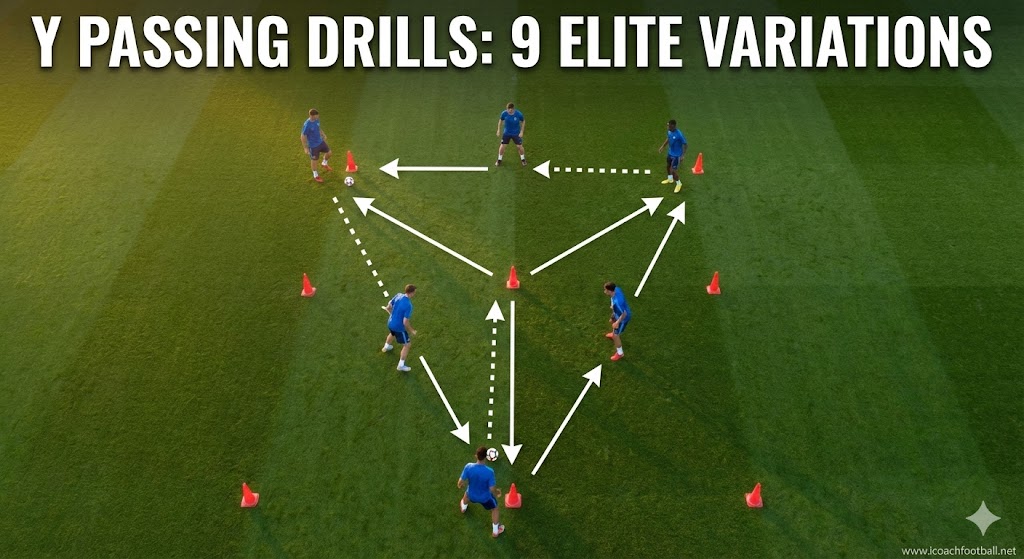
Used by elite academies like Benfica, Ajax etc. and now mostly in all pro team or academies, the Y Passing Pattern simulates the most common shape in football: The Triangle. Unlike a standard square or straight drill, the “Y” shape forces players to master passing angles, receiving on the back foot, and executing Third Man runs in a realistic midfield structure.
In this guide, we break down 9 Essential Variations—complete with animated GIFs—to take your team from a simple warm-up to complex combination play.
These drills are the perfect precursor to our Possession & Rondo Drills.
📋 Drill Profile: Quick Stats
| Category | Details |
| Drill Name | Y Passing Pattern (The Fork) |
| Age Group | U10 – Pro |
| Players | 5-8 Players per Grid |
| Grid Size | 12-15 yards (length) x 10 yards (width) |
| Focus | Passing Accuracy, Body Shape, Third Man Runs |
| Duration | 15 Minutes (3 mins per variation) |
Setup for Y Passing Drills
Before starting Variation 1, set up your grid:
- Place cones in the shape of the letter “Y”.
- Cone A (Start): The bottom of the Y.
- Cone B (Central): The middle junction (12 yards from A).
- Cones C & D (Top): The wide options (10 yards from B).
- Rotation: Follow your pass.
Phase 1: Basic Y Passing Drills (Warm-Up)
Use these first 3 variations to activate technical mechanics and open body shape.
Variation 1: “Wipe the Glass” (Open Up)
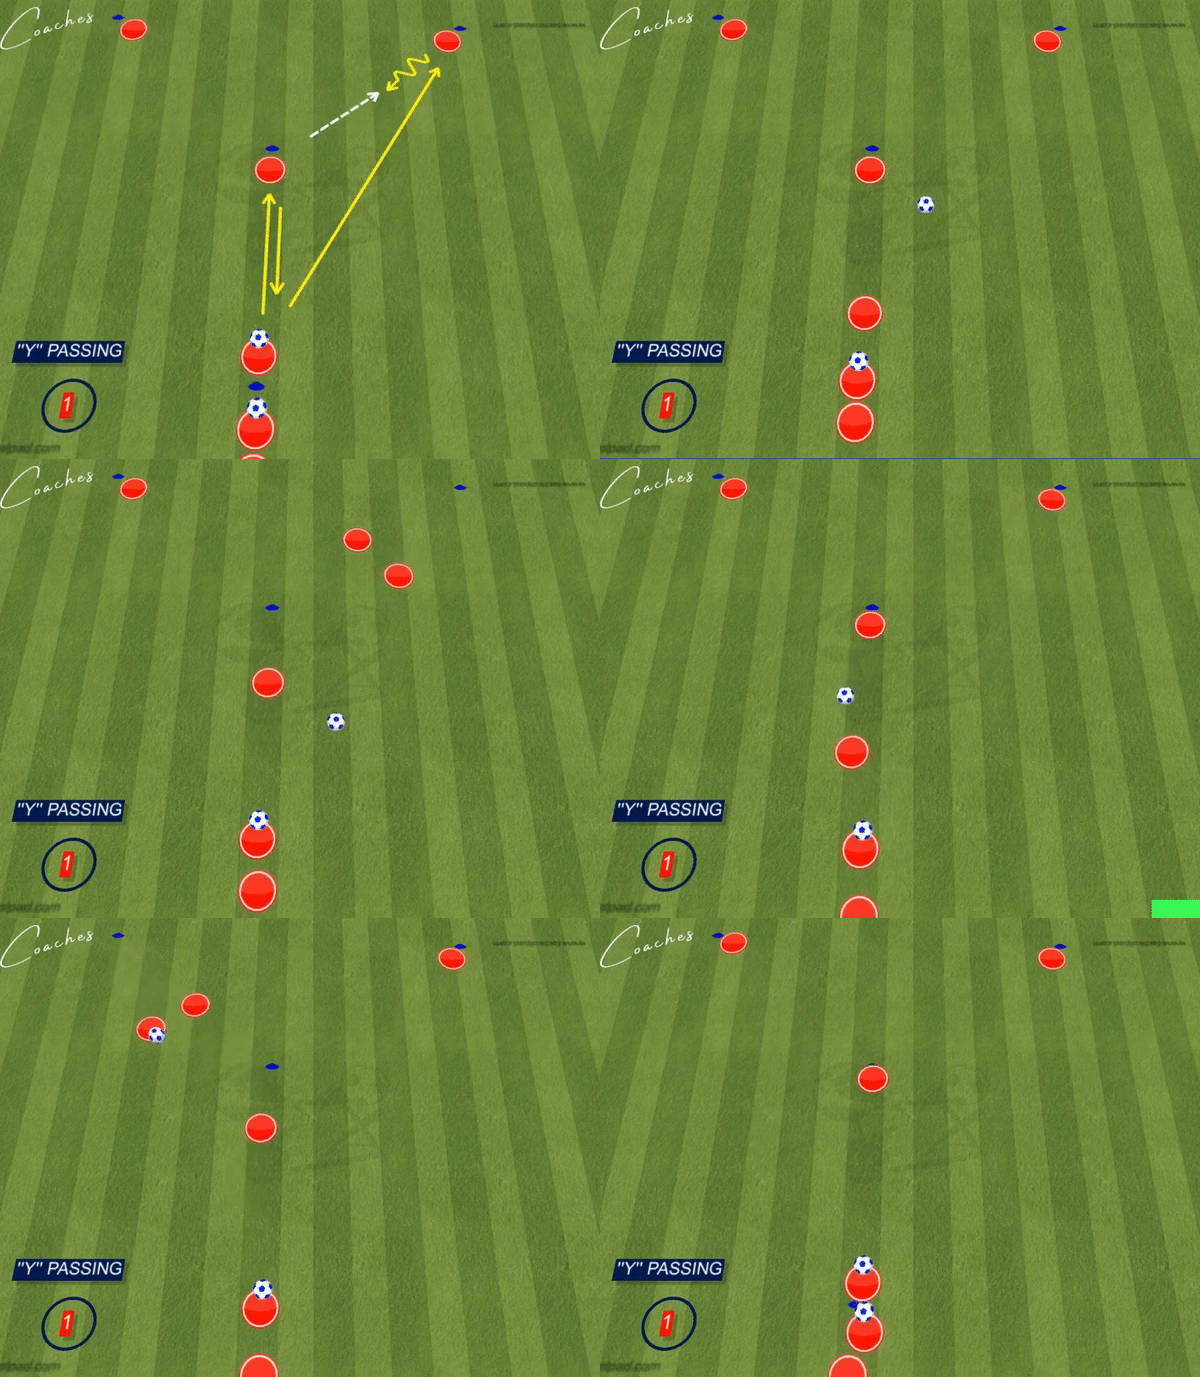
- The Action: Player A passes to Player B. Player B receives with their back foot (furthest from the ball), opens their hips, and passes to C.
- Coaching Point: “Scan before you receive!” Player B must check their shoulder to see where C is before the ball arrives.
- Why it works: It fixes the bad habit of receiving with a closed body shape.
Variation 2: Set & Spin (The Bounce)
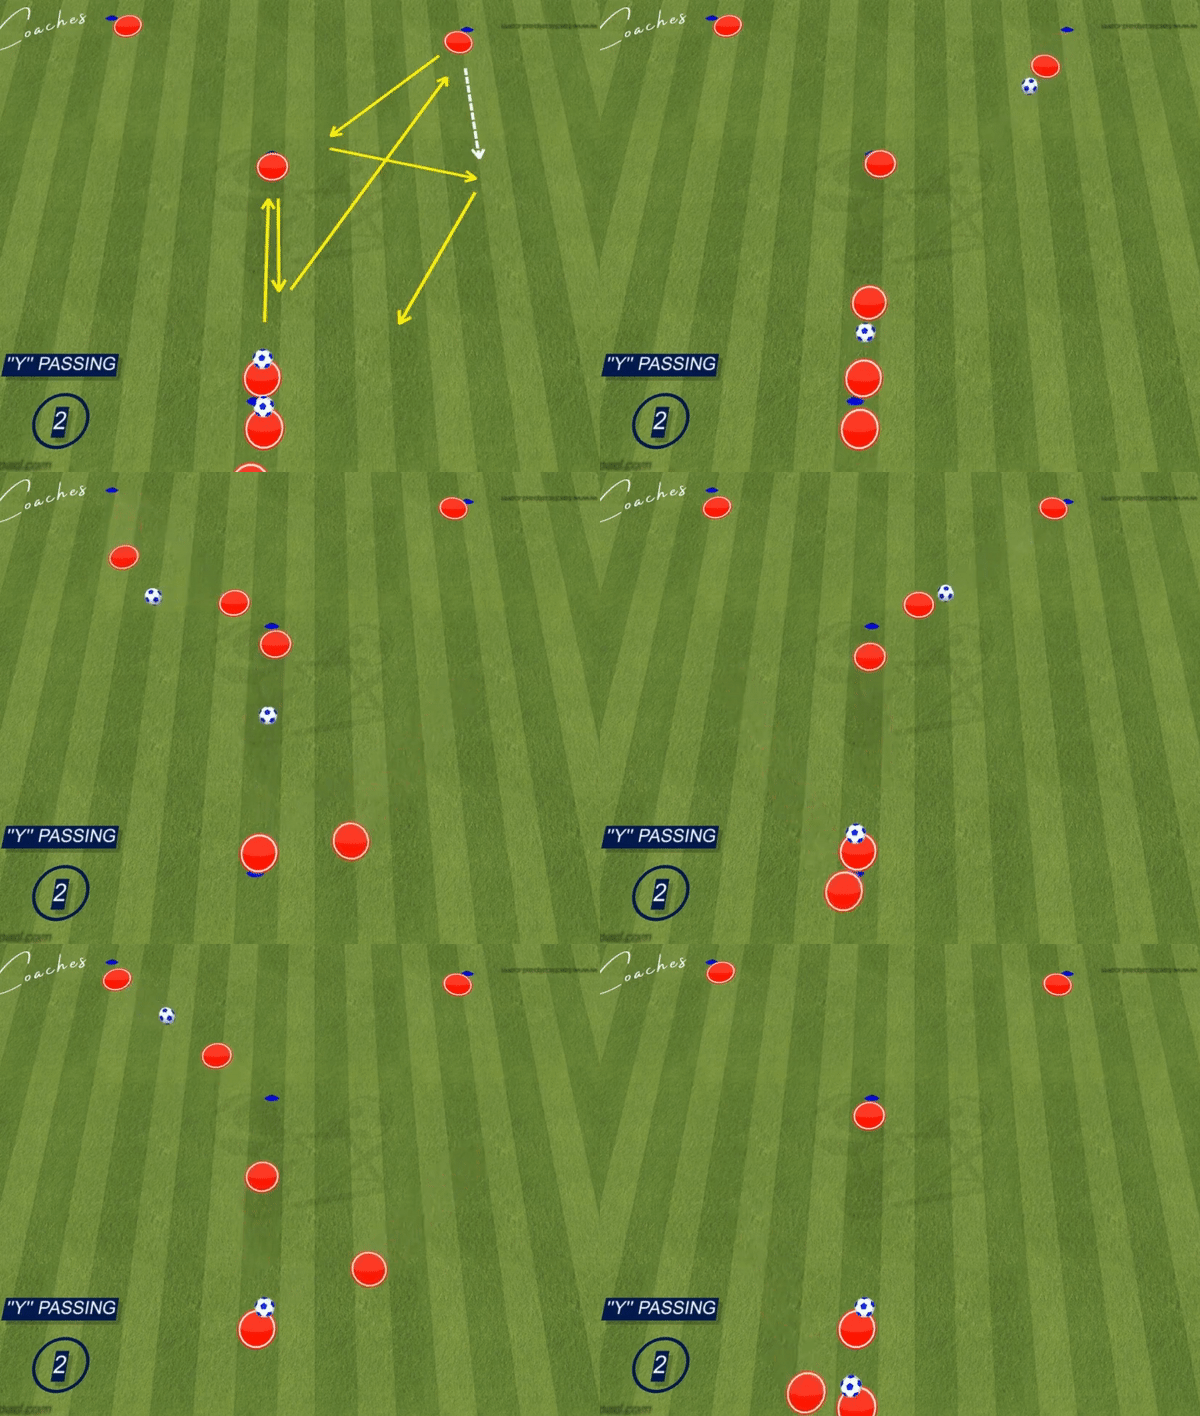
- The Action: Player A passes to B. Player B sets the ball back (1-touch) to A. Player B then spins around the cone to receive a through ball from A.
- Coaching Point: The set back must be soft (“cushioned”), but the spin must be explosive.
- Why it works: It teaches midfielders to separate from a defender after laying off the ball.
Variation 3: The “Double Pass” (1-2 Combo)
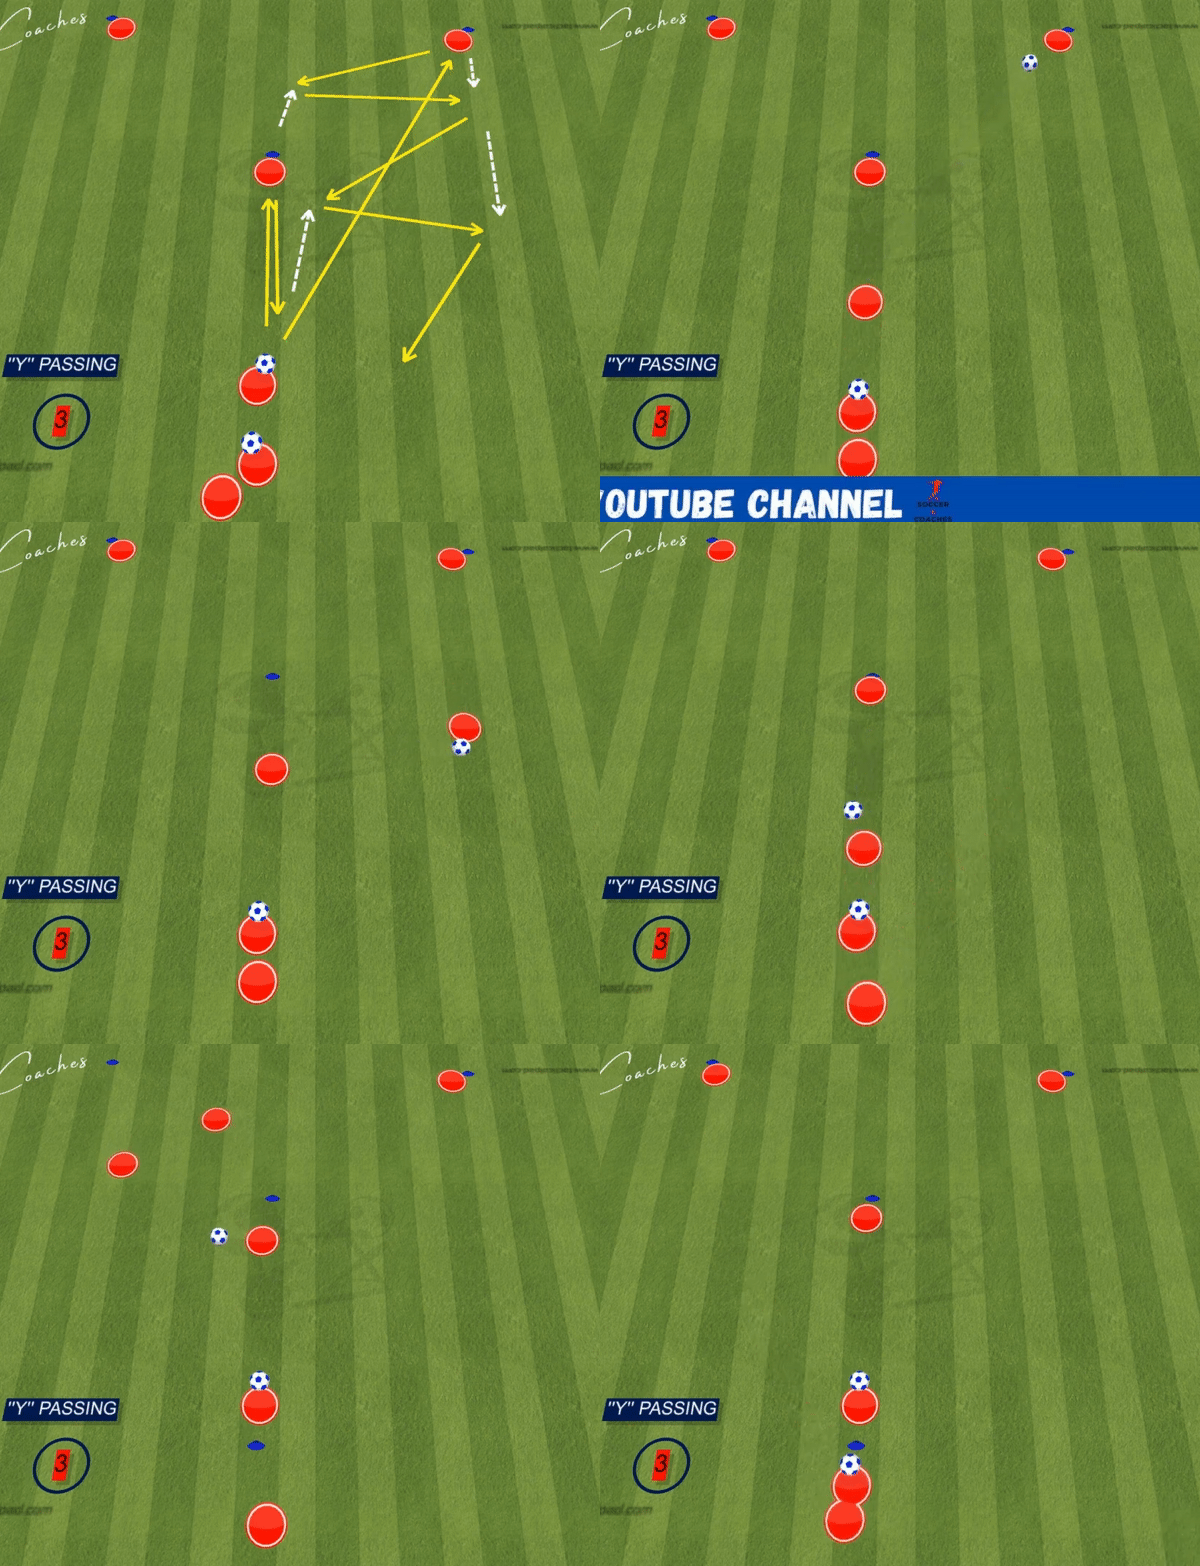
- The Action: Player A passes to B. Player B plays a wall pass back to A (who is moving forward). Player A plays the ball into the path of C.
- Coaching Point: Player A must continue their run after the first pass to support the play.
- Why it works: Classic “Give and Go” movement used to break defensive lines.
Phase 2: Midfield Mastery (Progression)
Now we increase the cognitive load. These drills require timing and communication.
Variation 4: The “Third Man” Run (Up-Back-Through)
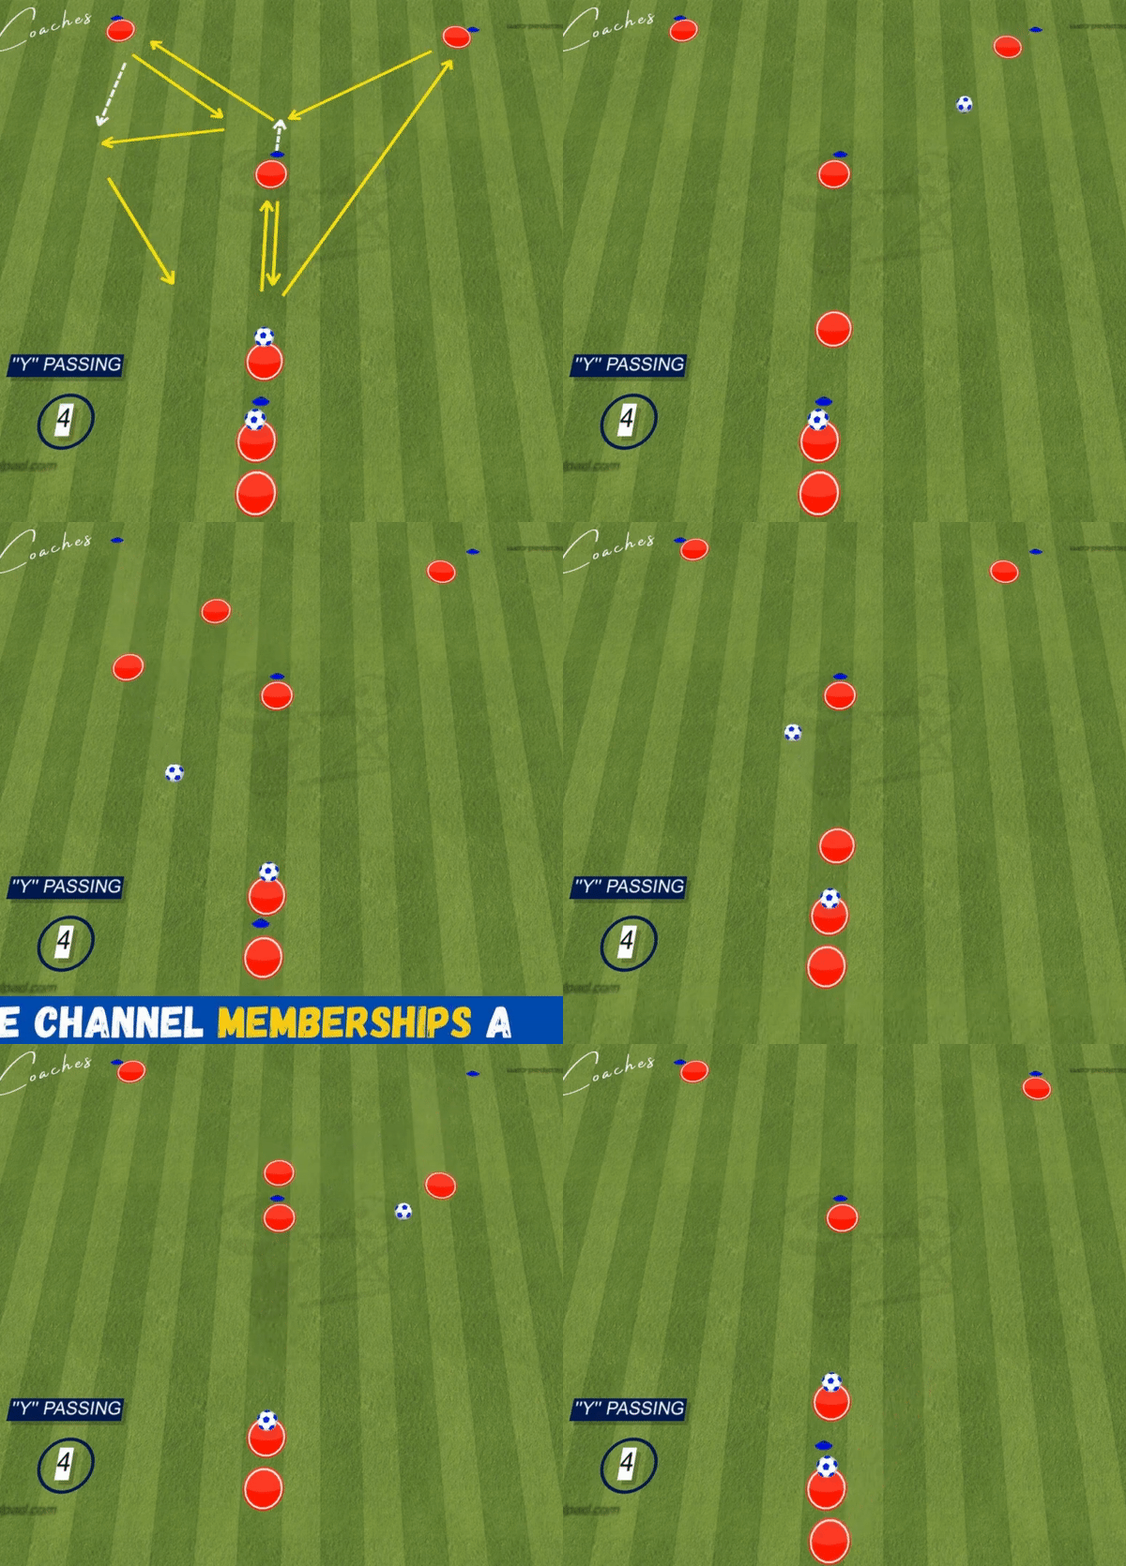
- The Action: Player A skips the middle man and passes diagonally to Player C (who checks down). Player C sets the ball 1-touch to Player B (the “Third Man”). Player B plays a first-time pass to Player D.
- Coaching Point: This is the famous “Ajax Triangle.” The timing of Player B’s support run is critical—don’t arrive too early!
- Why it works: It teaches players to use a target man to set up a forward-facing midfielder.
Third Man runs are essential for Attacking Soccer Tactics.
Variation 5: The Overlap
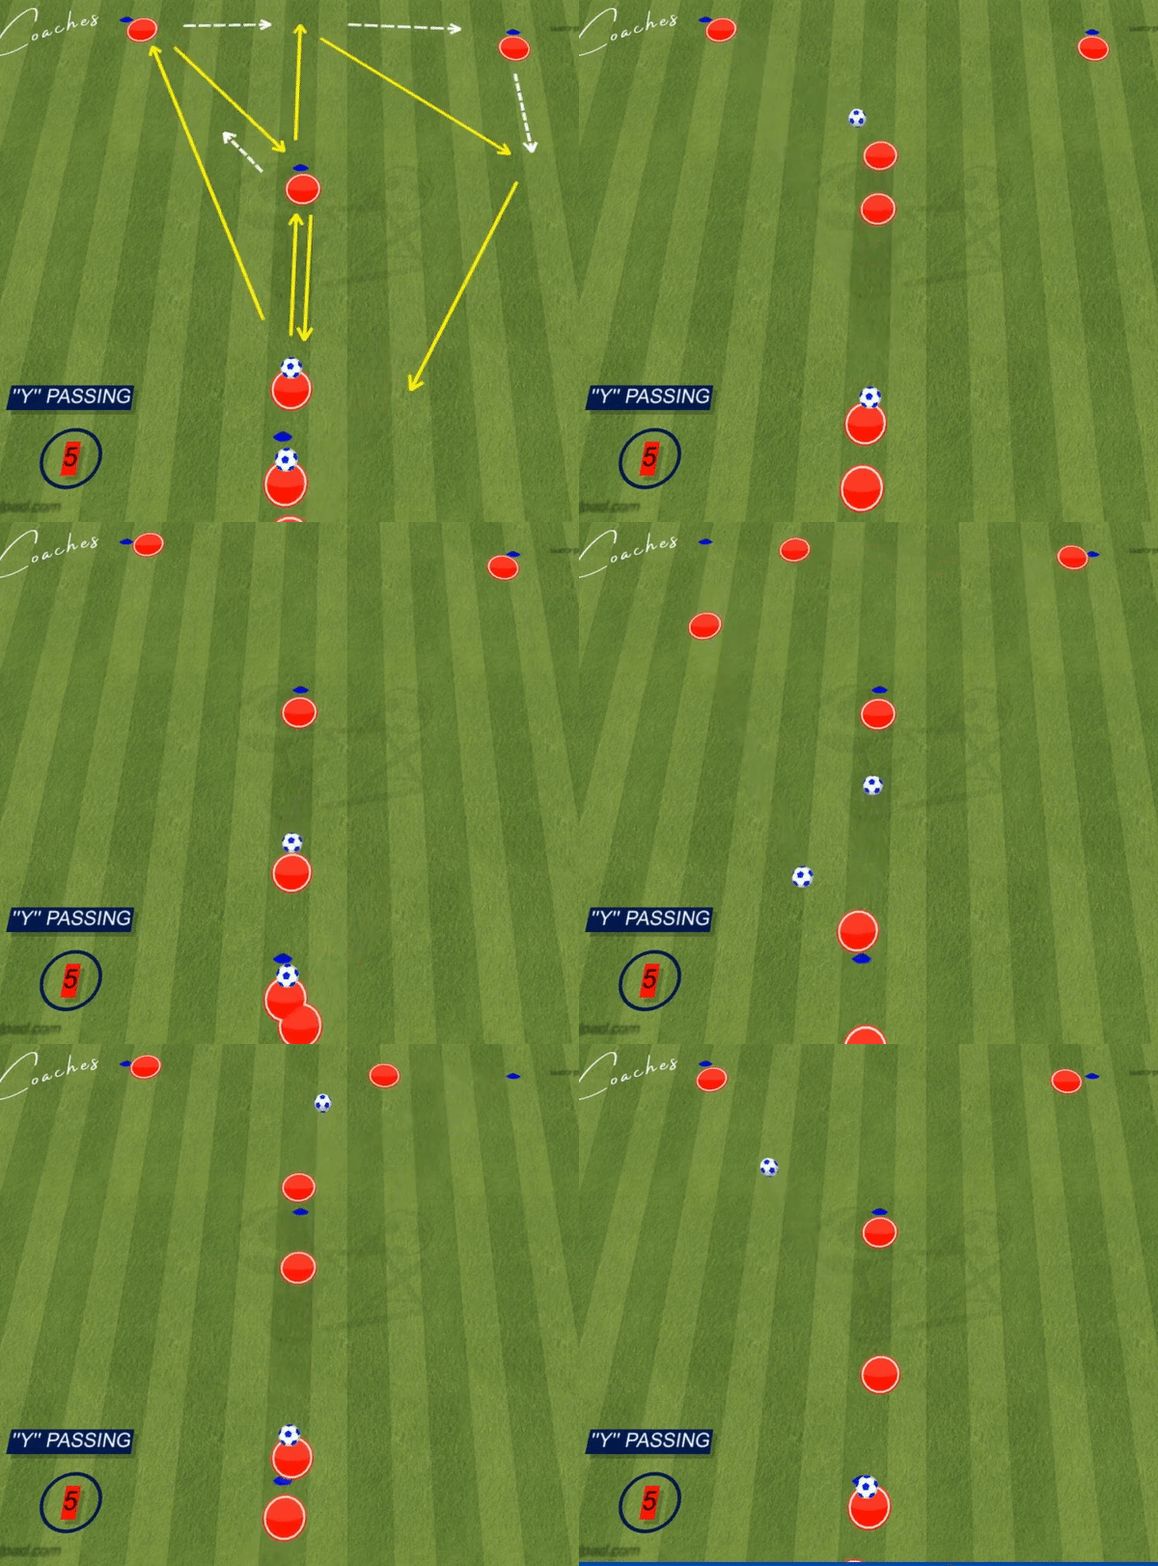
- The Action: Player A passes to B and immediately sprints around the outside (overlap). Player B dribbles inside and slips a reverse pass to A.
- Coaching Point: Communication is key. Player A must shout “Overlap!” to trigger the movement.
- Why it works: Creates 2v1 situations in wide areas.
Variation 6: The “Dummy” (Deception)
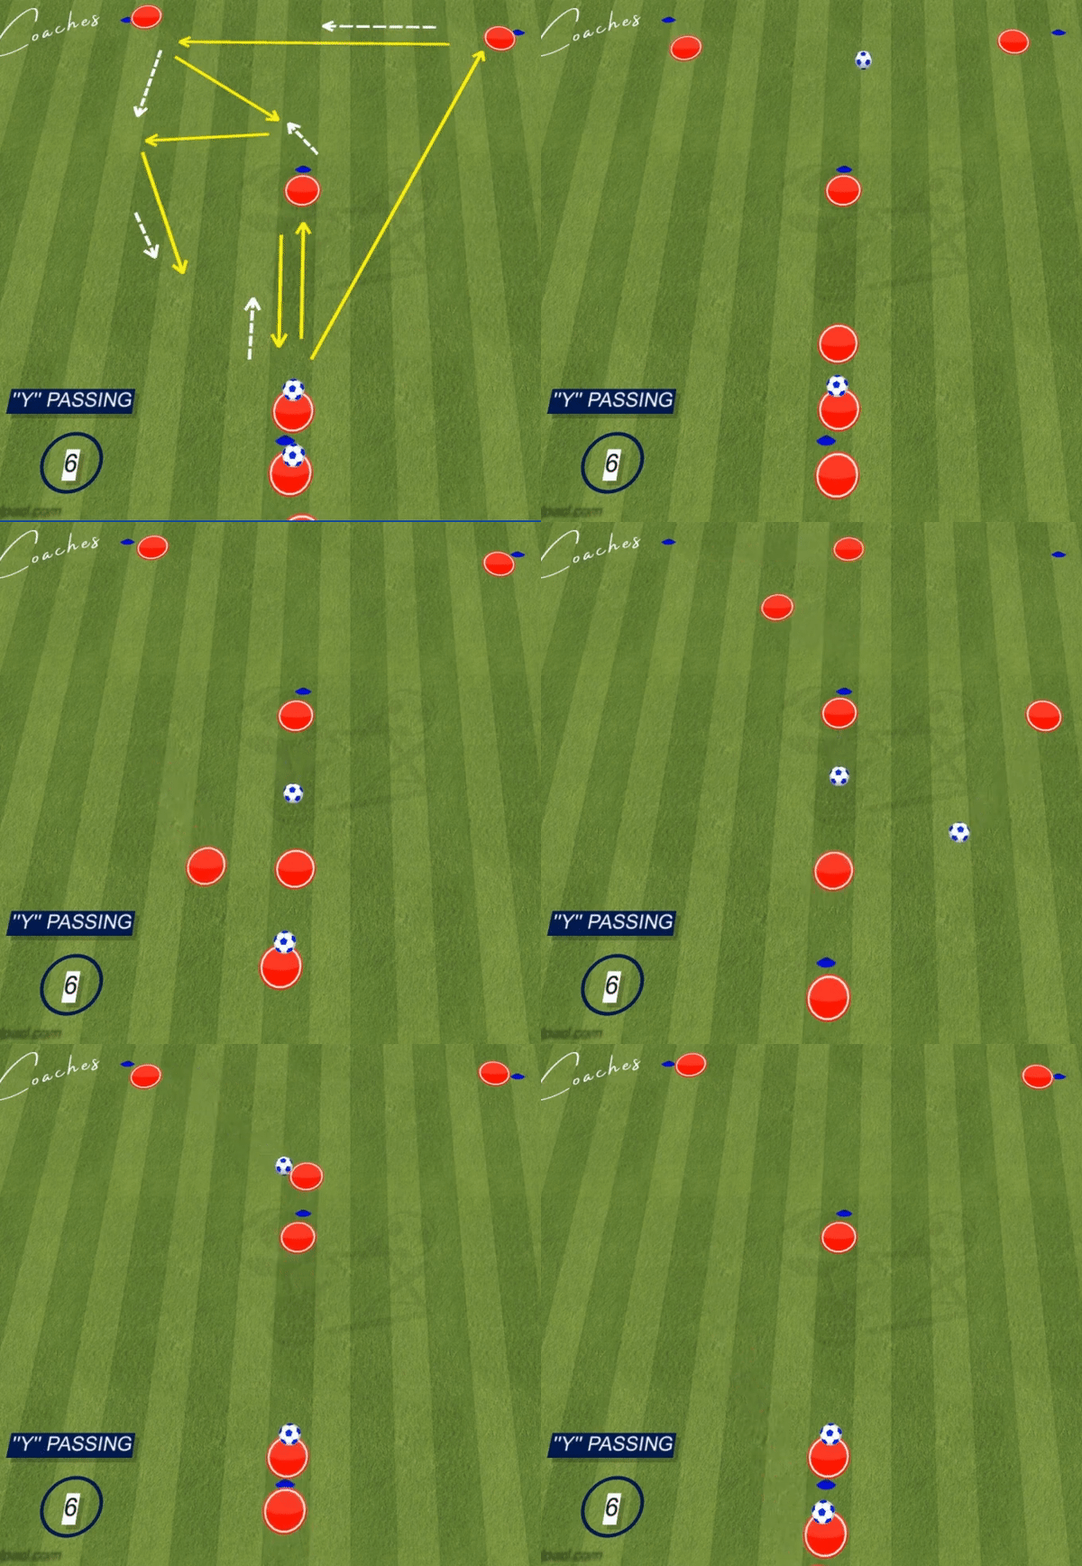
- The Action: Player A passes hard to Player B. Player B lets the ball run through their legs (dummy) to Player C, then spins to receive the return pass.
- Coaching Point: Player B must sell the fake by stepping over the ball convincingly.
- Why it works: Teaches deception and awareness of space behind you.
Phase 3: Advanced Combinations
For U14+ and elite teams. High speed, high complexity.
Variation 7: The Double Wall Pass

- The Action: A complex sequence involving two rapid wall passes (one at the start, one at the end) before the final ball is played.
- Coaching Point: One-touch play is mandatory. If you take two touches, the rhythm is broken.
Variation 8: The “Switch” (Long Ball)
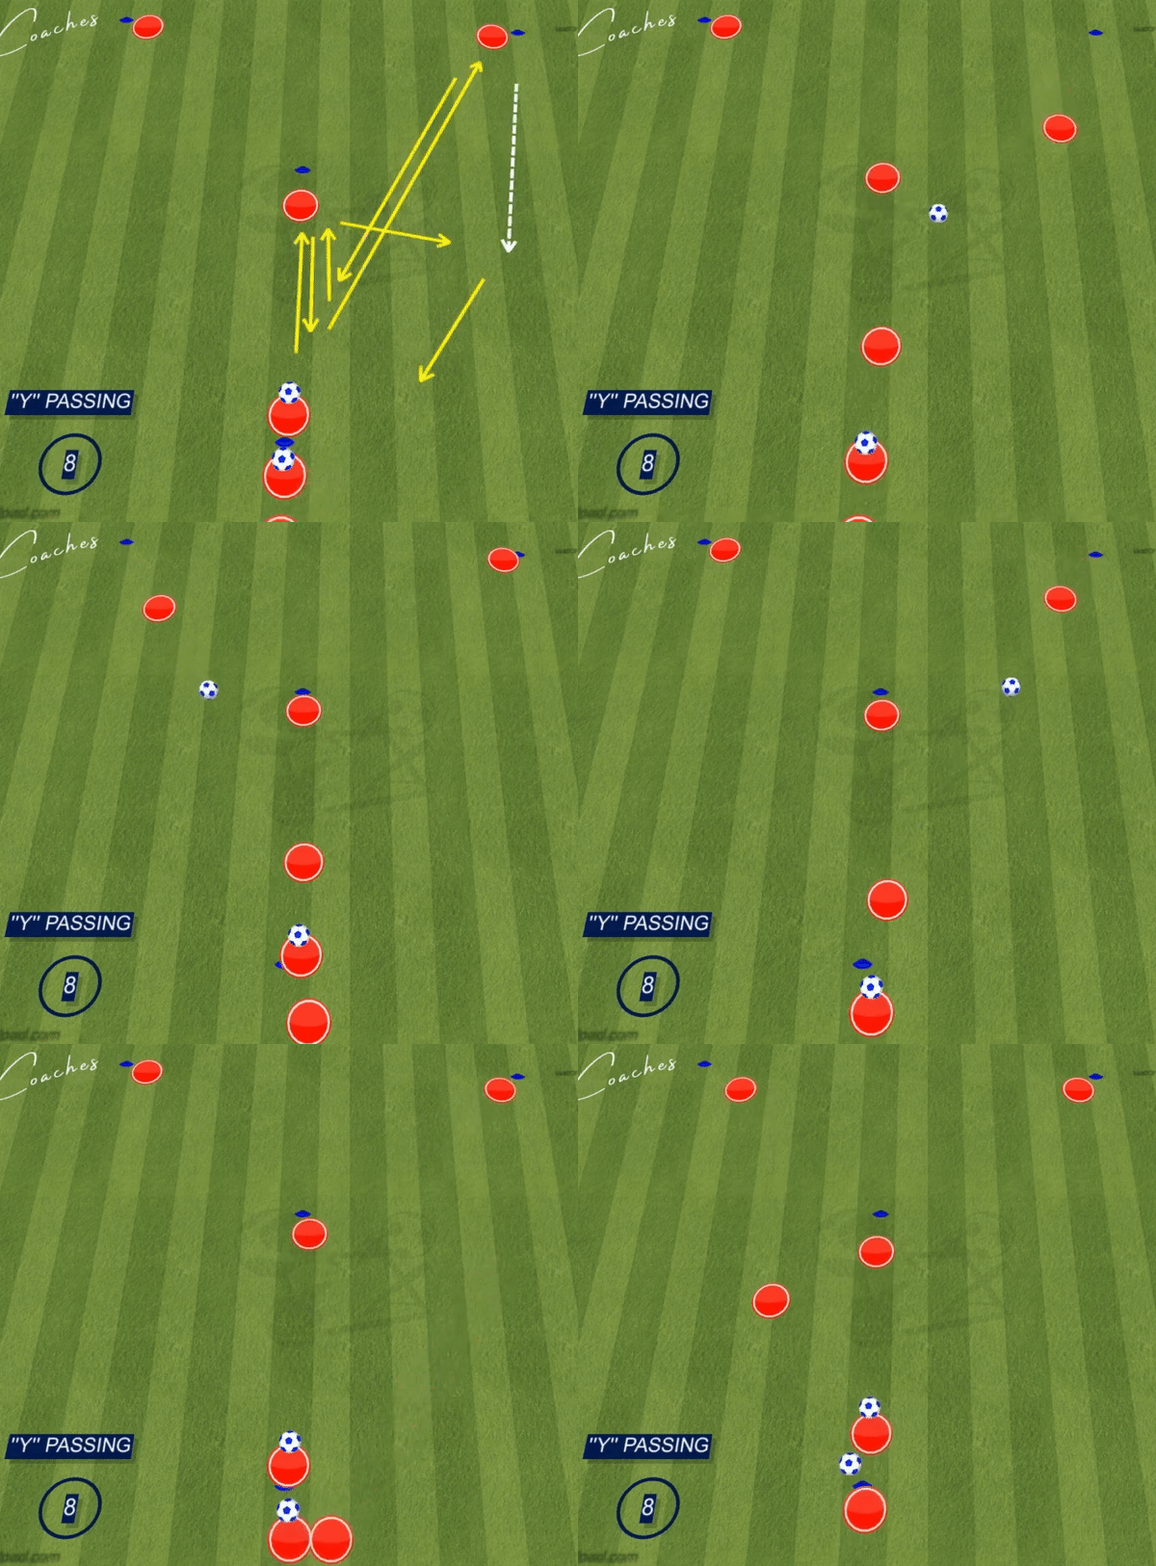
- The Action: Instead of short passing, we focus on switching play. Player A plays a long, driven pass to Player C. Player C sets to B, who switches it to D.
- Coaching Point: Lock the ankle and drive through the ball for power and accuracy over distance.
Variation 9: Free Flow (Decision Making)
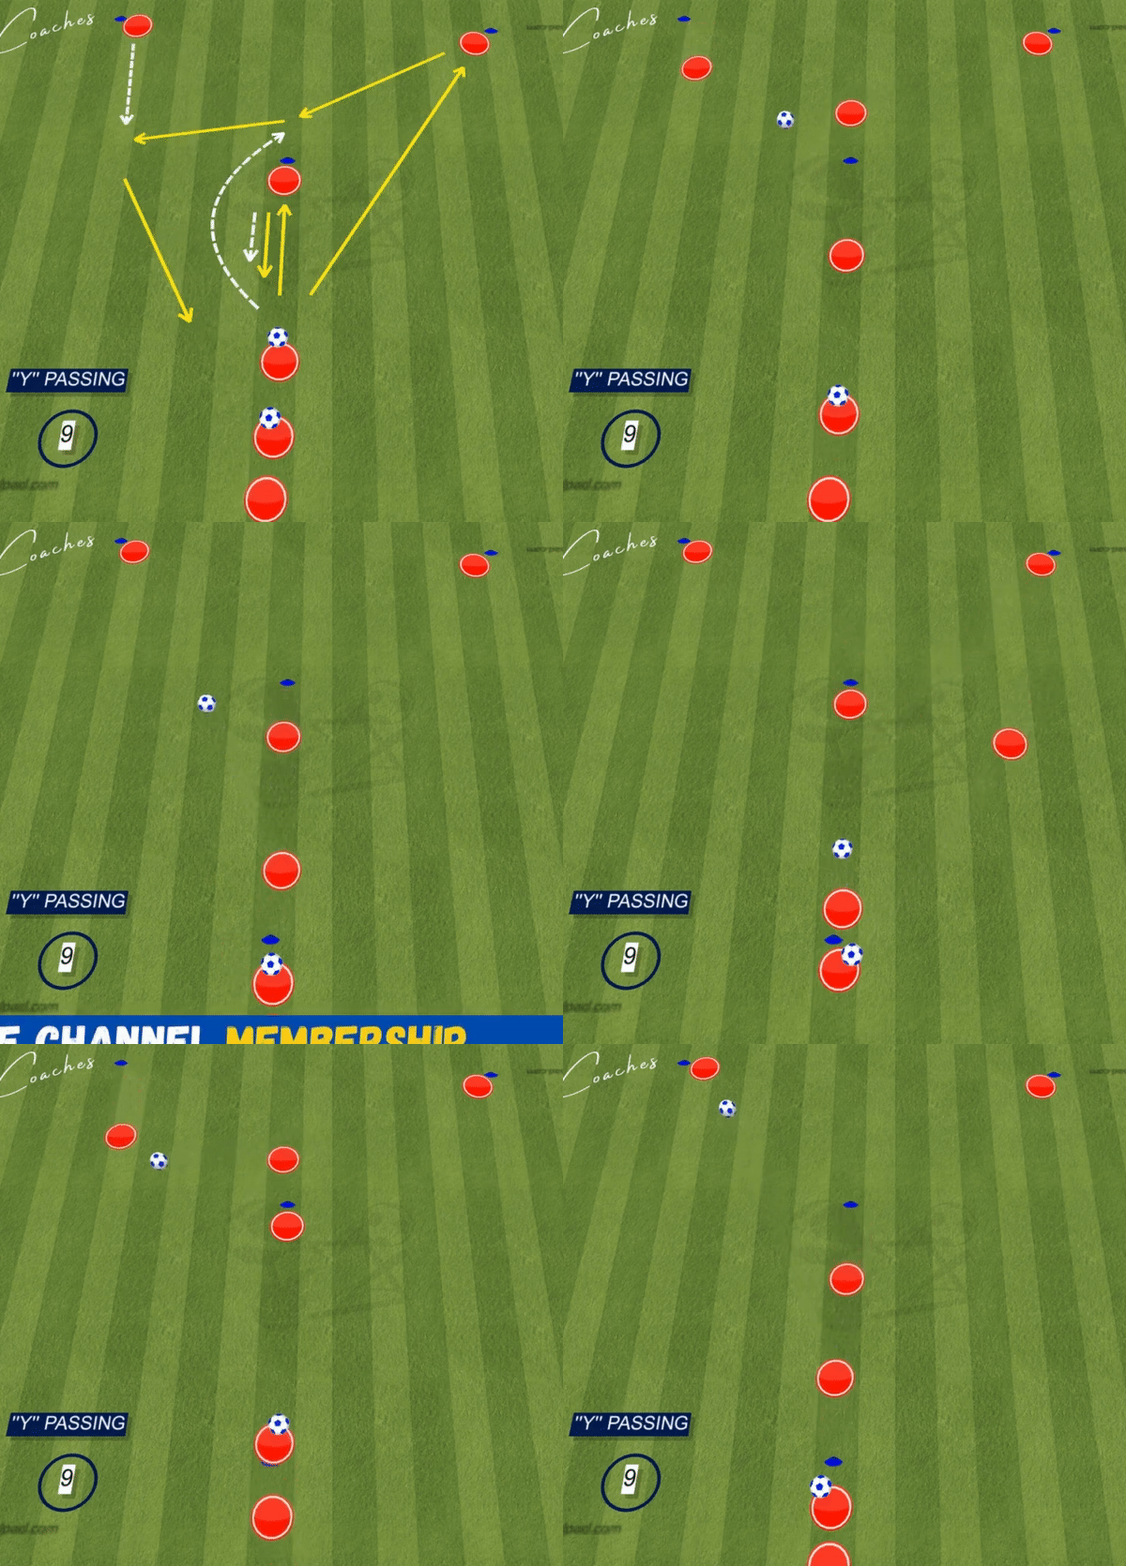
- The Action: The coach calls out a color or number, and the players must execute that specific pattern instantly.
- Coaching Point: Cognitive reaction speed. Can they switch from “Pattern 1” to “Pattern 4” without stopping the ball?
💡 Coach’s Note: How to Fix Common Mistakes
1. “Standing Still”
- Problem: Players waiting for the ball flat-footed.
- Fix: Implement the “Check-Away” Rule. Before receiving any pass, the player must move away from the cone (defender) and check back to the ball.
2. “Silent Soccer”
- Problem: No communication leads to confusion in variations 4-9.
- Fix: Demand that the passer calls the name of the receiver. No name = No pass.
3. “The Bobble”
- Problem: Passes are bouncing, making it hard to play 1-touch.
- Fix: Focus on striking the equator (middle) of the ball with a locked ankle. A bobbling pass kills the rhythm of the Y Drill.
Y Passing Drills: FAQ
Why are Y Drills more effective than Square Drills?
While square drills are great for basic technique, they are often “flat.” The Y Drill is superior because it introduces Triangulation and Depth.
Angles: In a match, passes are rarely straight lines; they are diagonal. The Y shape forces players to pass and receive at realistic 45-degree angles.
Depth: It teaches the concept of “breaking a line” by playing a pass through a gap to a forward player (the top of the Y).
How does the Y Drill translate to a real match?
The “Y” shape perfectly replicates the Central Midfield Triangle (the relationship between the #6, #8, and #10).
Scenario: Imagine your Center Back (Player A) has the ball. Your Defensive Midfielder (Player B) checks to the ball, and your Attacking Midfielders (C & D) make runs into the half-spaces.
Result: This drill trains the exact muscle memory needed to play out from the back and break opposition pressure.
How do I progress this drill?
Once players master the patterns, add a Passive Defender in the middle. The defender doesn’t tackle but blocks passing lanes, forcing Player B to constantly adjust their angle of support.
Which positions benefit most from Y Passing Patterns?
This is essential training for Central Midfielders (CM/CDM/CAM) and Center Backs (CB).
Midfielders: Learn to scan over their shoulder (check their blind spot) before receiving.
Defenders: Learn to “punch” passes through tight gaps instead of just playing safe lateral passes.
Can I run this with 4 players?
Yes, but the rotation will be slow, and players will get tired quickly. We recommend 5-6 players so there is always one person resting in line, keeping the intensity high for those on the ball.
Is this suitable for U8/U9?
For U8/U9, stick strictly to Variation 1 (Open Up). The complex patterns like the “Third Man Run” are cognitive overloads for players who are still mastering ball control.
For younger age groups, check out our specific U10 Soccer Drills.
